



Creating a schedule allows you to route incoming calls based on your business hours and availability. You can set up schedules at each stage—whether for a specific extension, your main switchboard, IVR systems, or ring groups—and redirect calls based on specific conditions, such as to voicemail or another department.
Access the Schedule Manager
To access the schedule manager:
- Click the phone system icon
- Click “Applications”
- Click “Schedule”
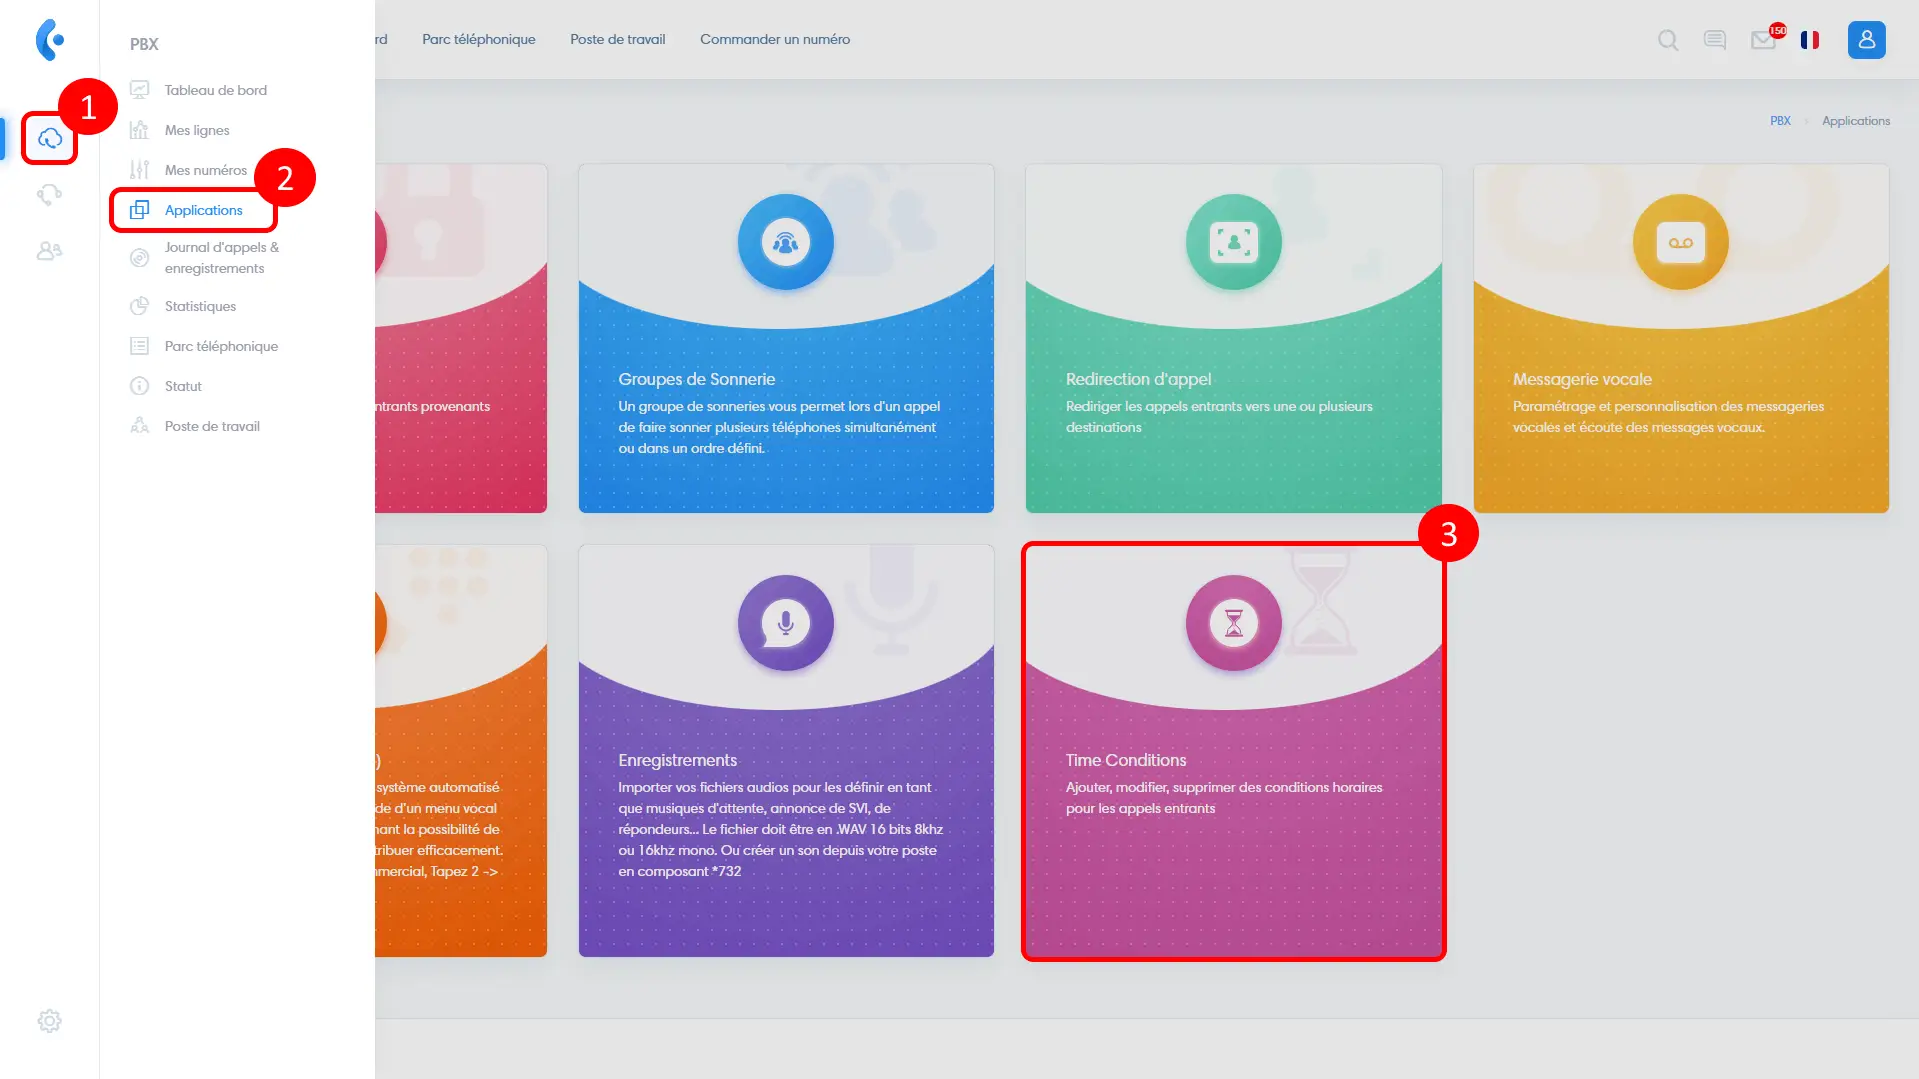
Manage Schedules
- Create a new schedule
- Edit an existing schedule
- Delete the schedule
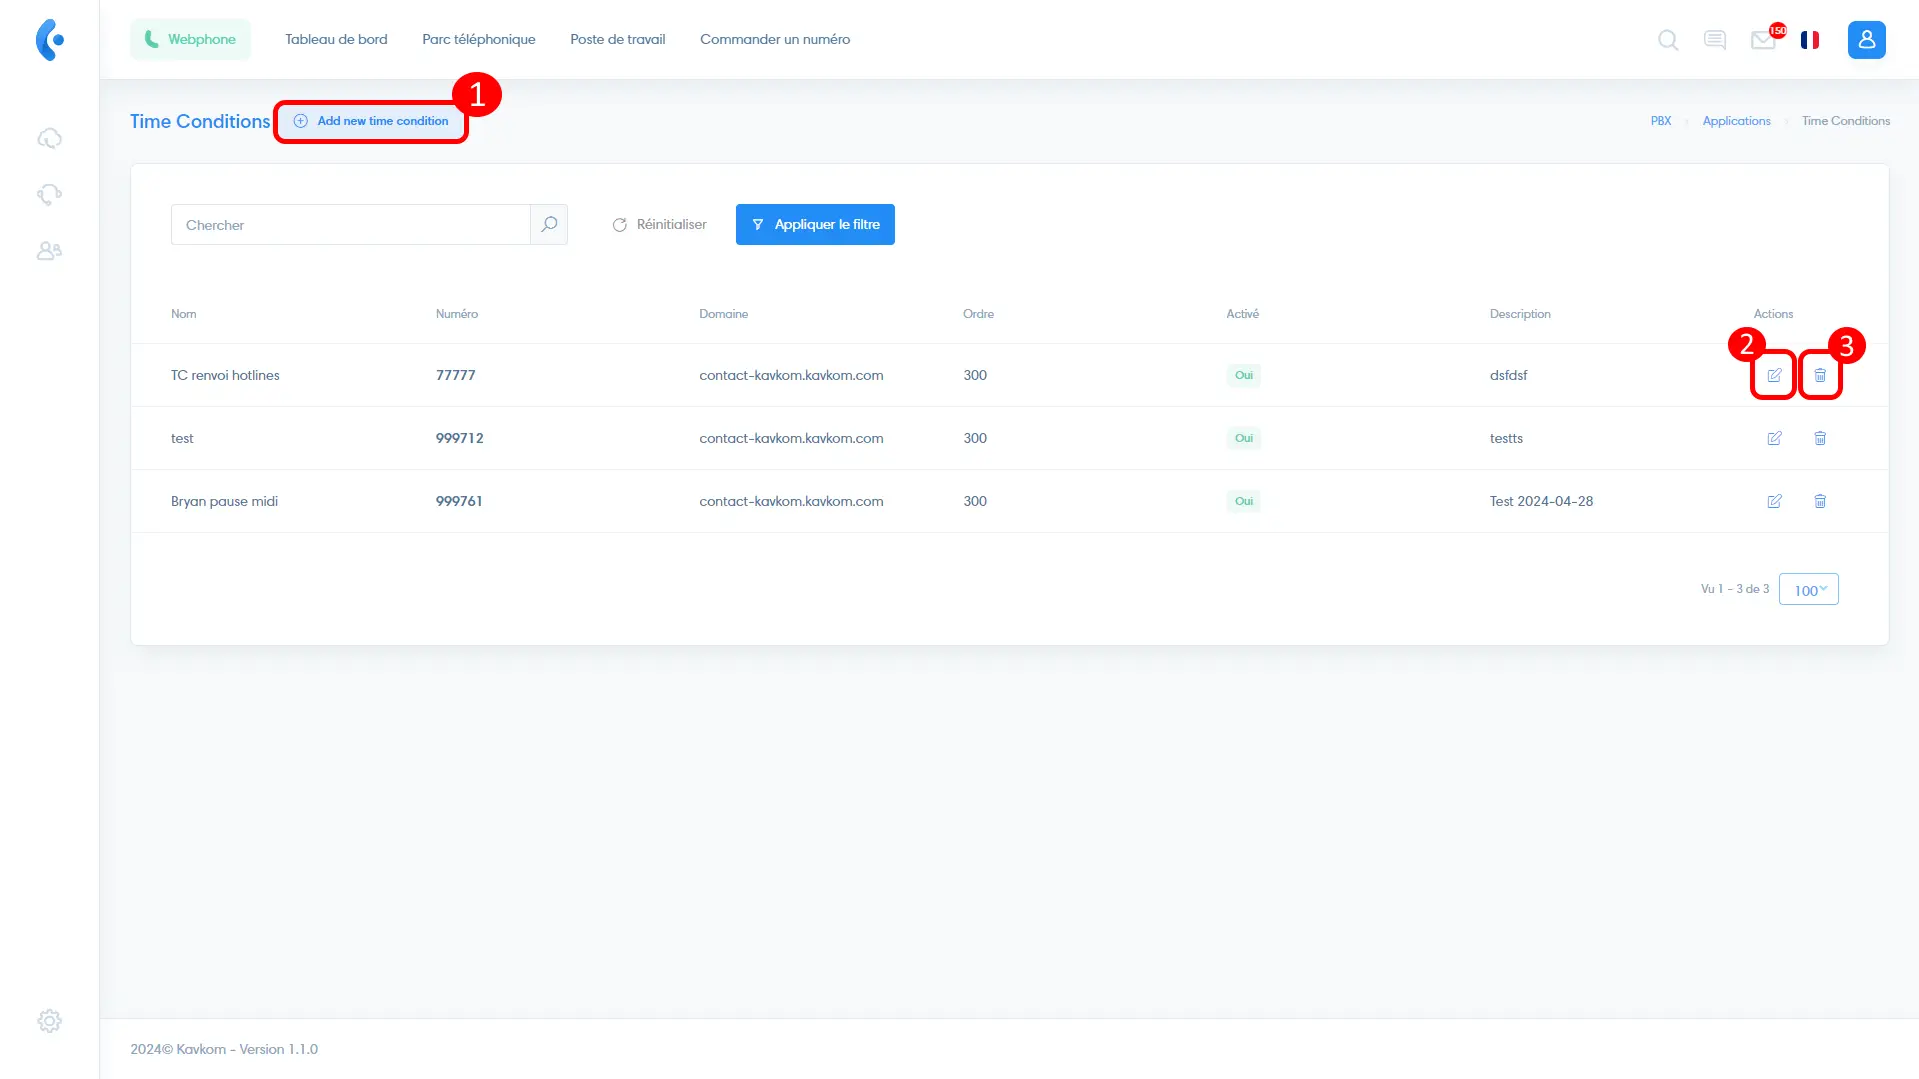
Create a new schedule
In the schedule manager, click “Add a schedule.”
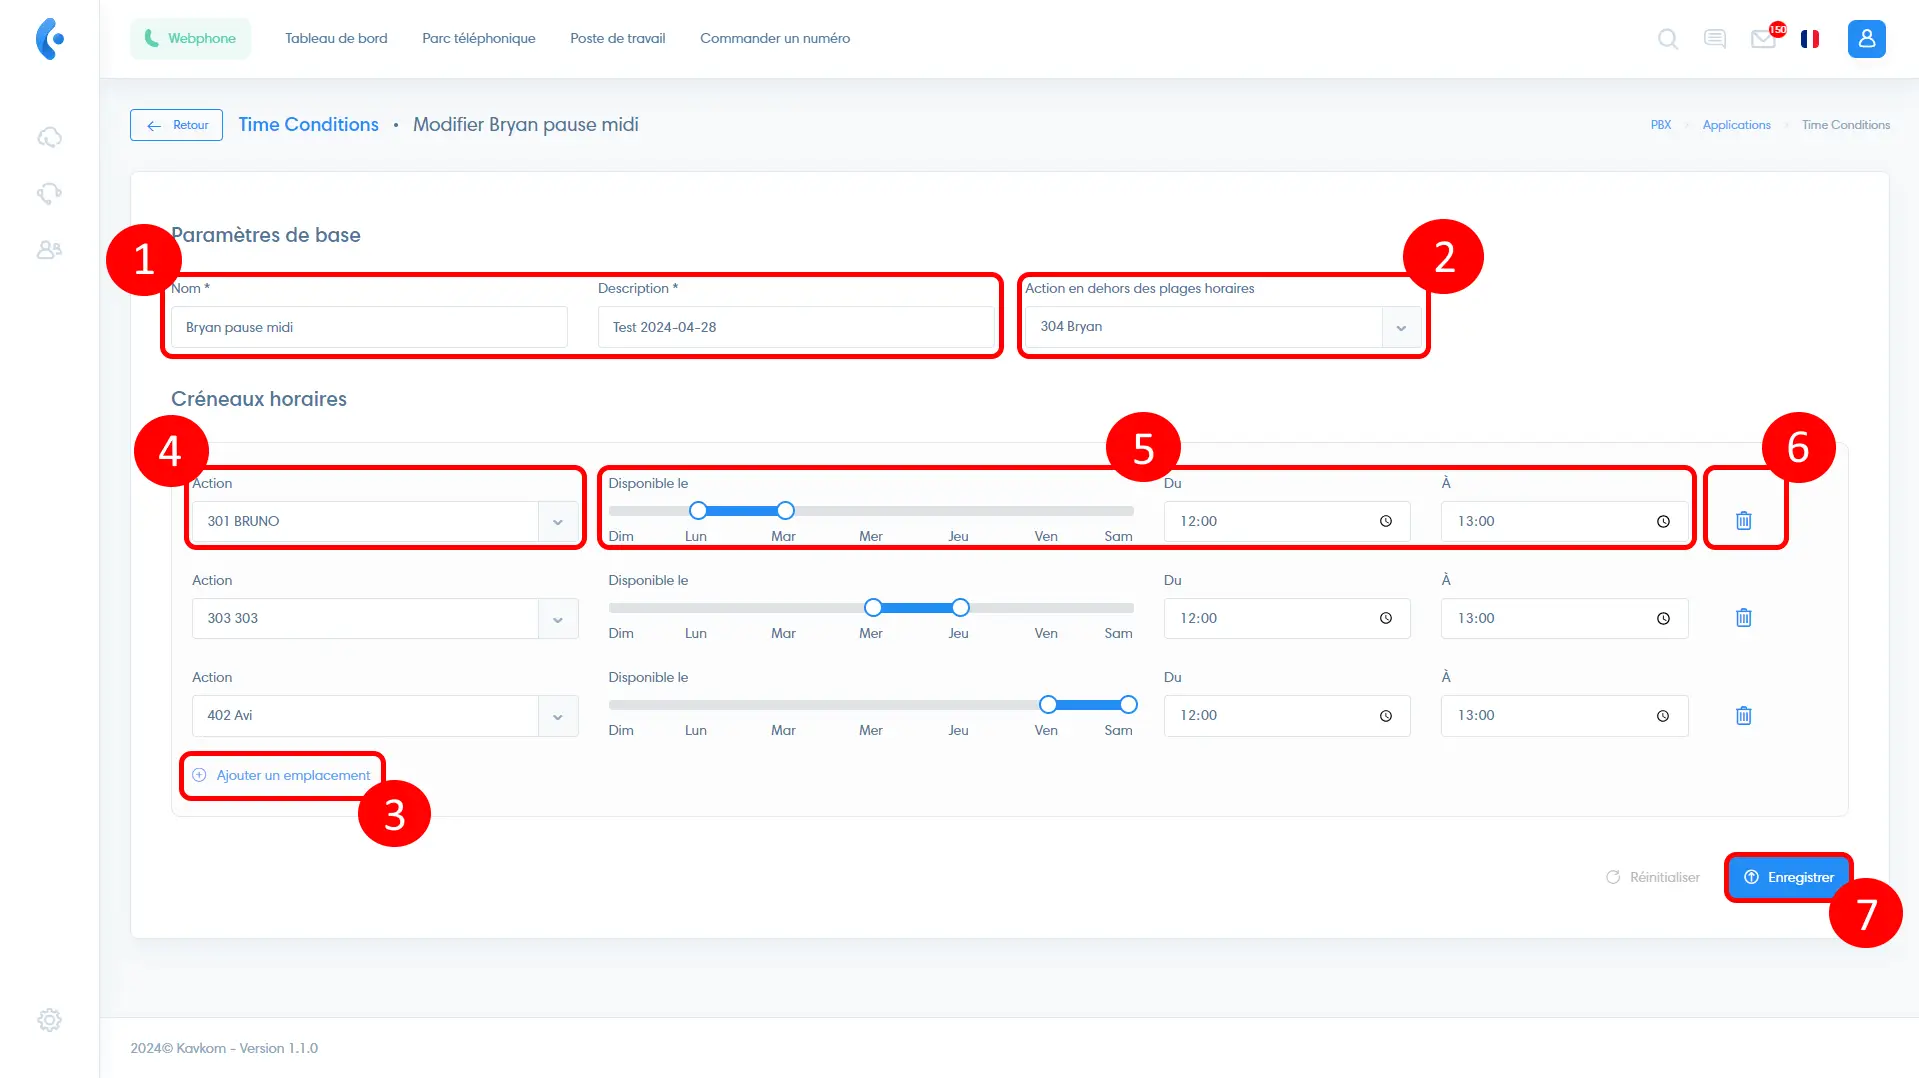
Next, enter the information needed to identify and configure your schedule:
- Name and description
- Select where to route calls outside the time periods you will define
- Click “Add a Location” to add a rule. You can add as many rules as needed. Note: Rules are arranged in order of priority. Therefore, if the same schedule is defined multiple times, the first one will take precedence.
- Specify where to route calls for the rule you are about to define
- Specify the day(s) and time range for the rule
- Delete the rule
- Save your changes by clicking “Save.”
Once you’ve created your schedule, you can route calls from one or more numbers to these conditions. To do so, see the article “Set Up Your Numbers.”
You can also set it as an action from any other extension (ring group, IVR, etc.). This opens up almost endless possibilities.
