

An IVR is an interactive voice server. It’s a “voice robot” that greets callers and asks them to press a key on its keypad to be directed to the chosen destination.
For example: “press 1 for sales, press 2 for technical”.
Access the IVR menu
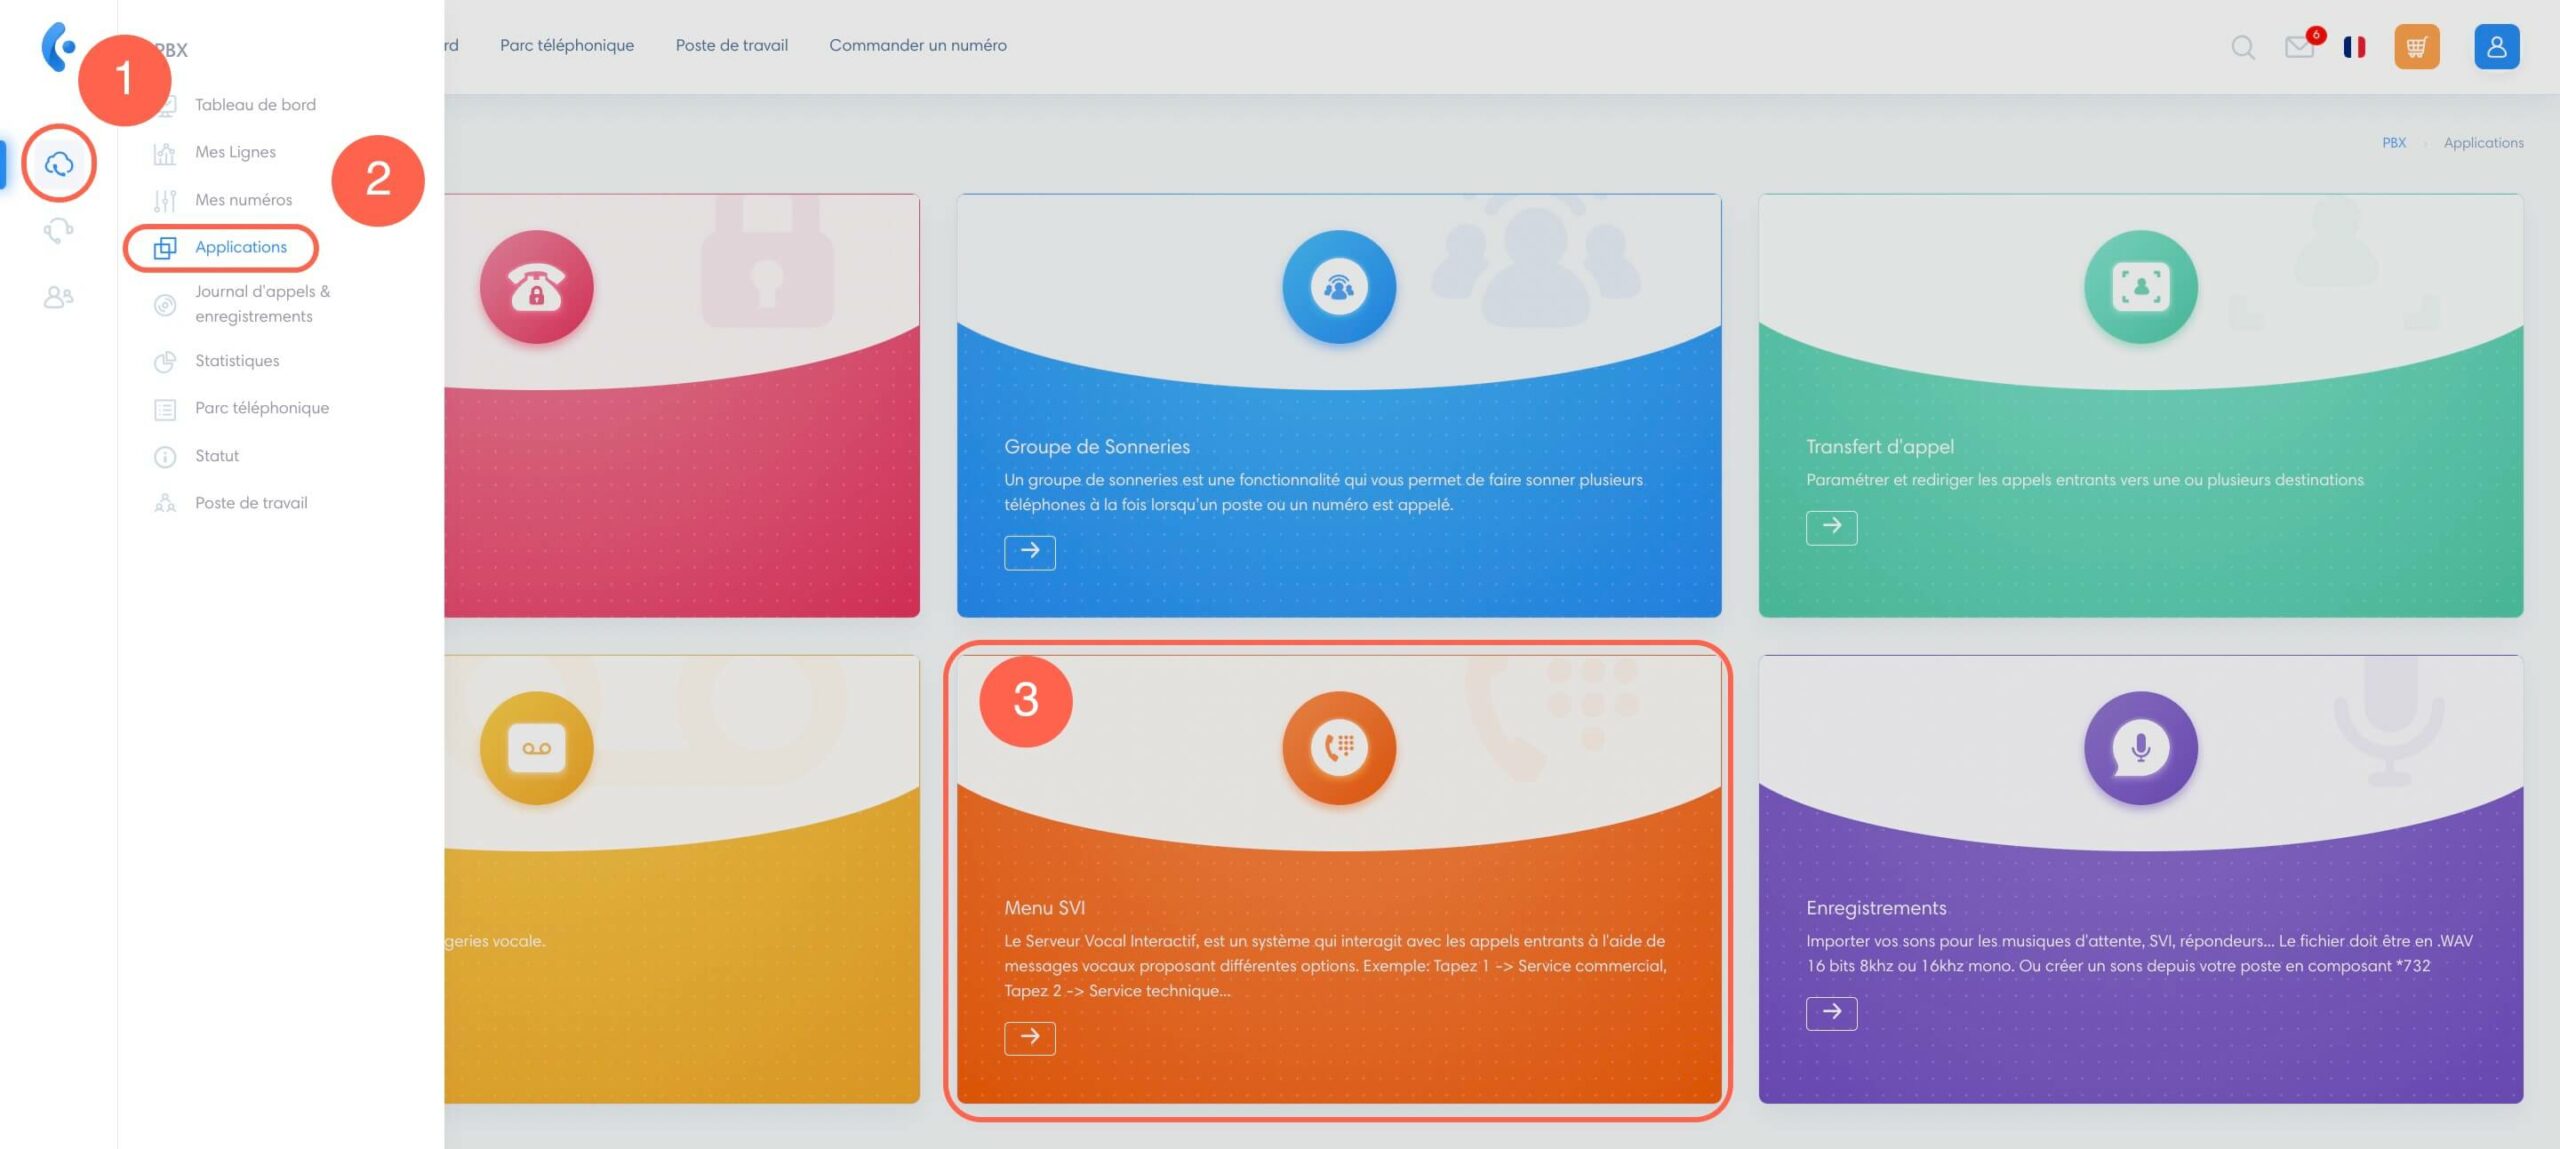
To access the section for creating a voice server :
- Click on the applications icon
- Click on “Applications
- Click on “IVR menu
Configuring an interactive voice server
Once in the “IVR menu” section, click on “Add an IVR menu”.
Main configurations
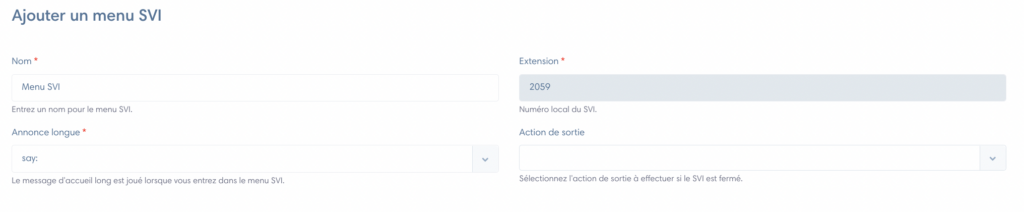
Then fill in the fields to configure your IVR menu:
- Name: indicate the name of the IVR
- Extension: automatically generated and cannot be modified
- Long announcement : select the voice server greeting announcement (see“Import personalized announcements“)
- Exit action: choose the action that will be triggered once the voice server is finished. For example, you can restart the IVR or ring an extension.
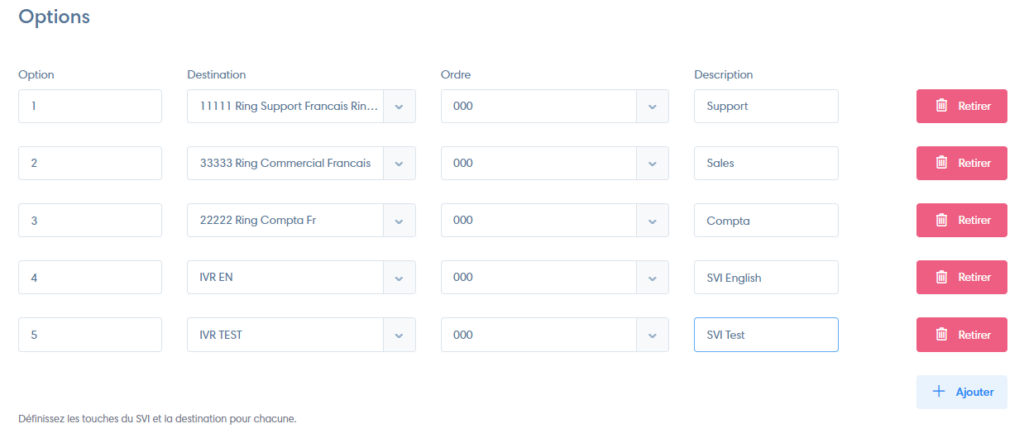
Define IVR menu buttons
- Option: digit or number to be entered on keyboard to select option
- Destination: action triggered when the person chooses this option
- Order
- Description
- Add: add a line to create a new option
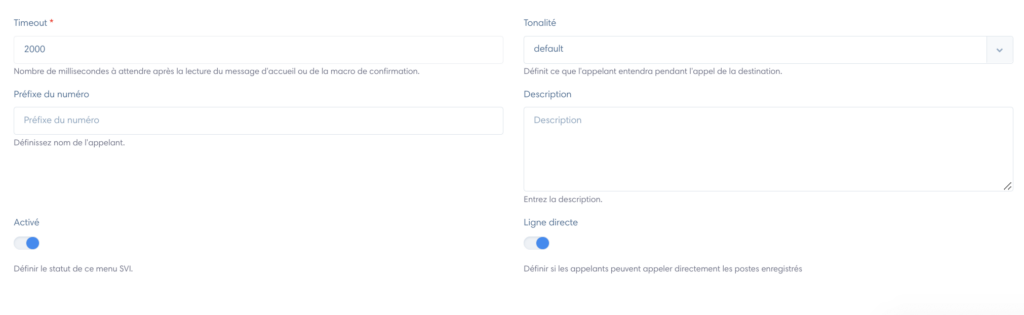
Other configuration options
- Timeout: shuts down IVR after X milliseconds
- Tone: choose the sound or announcement to be played when transferring to the destination
- Number prefix: display an indication that will be shown on the destination station(s) in front of the caller’s number.
- Enabled: activate or deactivate this IVR
- Direct line: define whether callers can dial directly to registered extensions
Once your IVR has been created, you can direct calls from one or more numbers to this IVR. To do this, consult the article“Set up your numbers“.
As the IVR is now present as an extension, you can also define it as an action from any other extension (ring group, another IVR, time condition…). The possibilities are almost endless. For example, to create a multi-level IVR, or other complex routing.
