To access the workstation, click on “Workstation” in the menu bar.
Understanding the workstation
The workstation is the essential tool for managing your calls, especially when using verified multipurpose numbers for your prospecting campaigns.
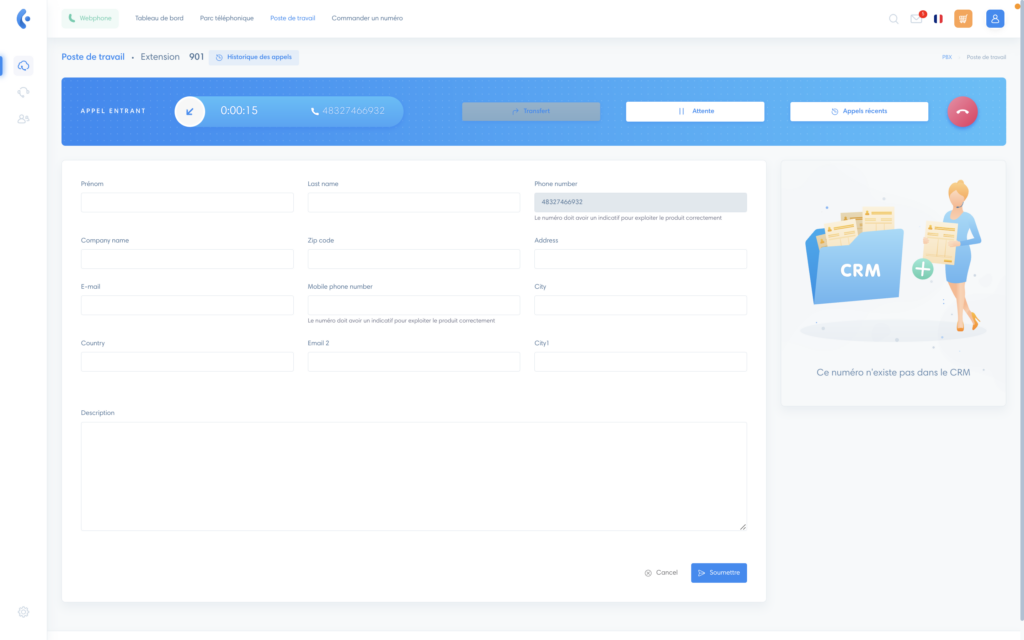
If the prospect does not have a record in CRM, the workstation will be displayed as in the image below during calls:
If the contact exists in CRM, his or her file is moved up to My Computer (see next section).
Using the workstation
The workstation comprises 4 sections:
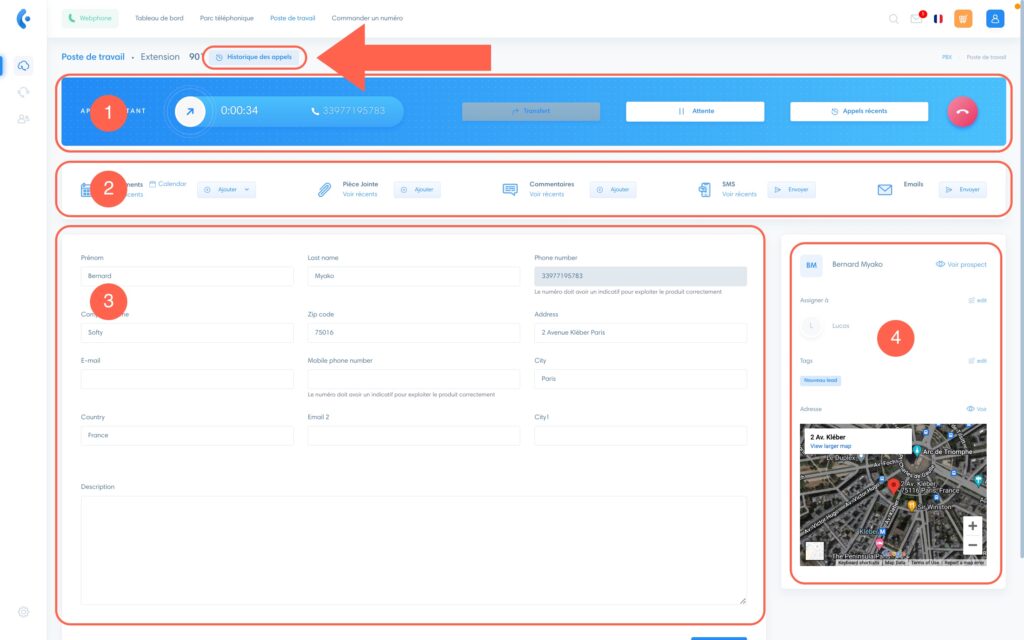
- The call keypad
- CRM actions
- Prospect information
- Prospect file
In the next sections of this article, we’ll explain each of these features in detail.
Note
By clicking on the “Call history” button (see arrow) you can display a list of all calls made and received on this line.
The call keypad

- Transfer: transfer the call to other lines in your domain. Go to this article to learn how to set up transfers
- Hold: put the call on hold
- Recent calls : find the prospect’s call history
CRM actions

(1) Events
- Click on “Add” to add an event
- Click on “Calendar” to go to the calendar interface
- Click on “View recent events” to see the latest events for this prospect.
(2) Attachment
- Click on “Add” to attach files to the prospect’s file.
- Click on “View recent” to see the attachments attached to this prospect’s file.
(3) Comments: add and retrieve comments for this prospect
(4) SMS: send and retrieve SMS messages for this prospect
(5) Emails: send an email
Prospect information
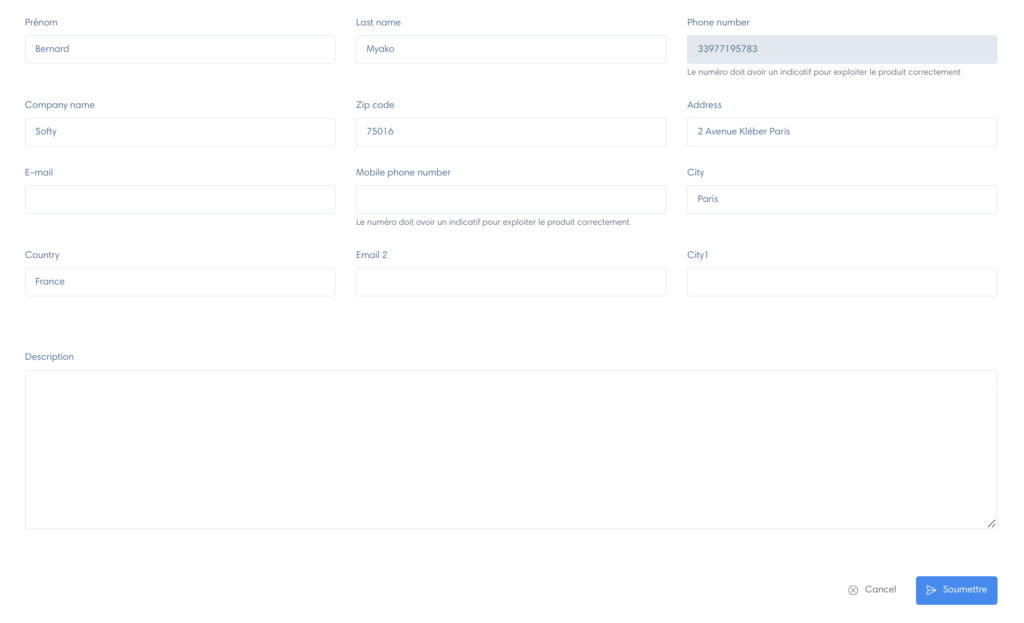
This section allows you to retrieve information about the prospect.
You can add and modify information in this section during or after the call.
Note
You cannot change the telephone number from My Computer. If you wish to change it, go to the prospect’s file in the CRM section.
The prospect file
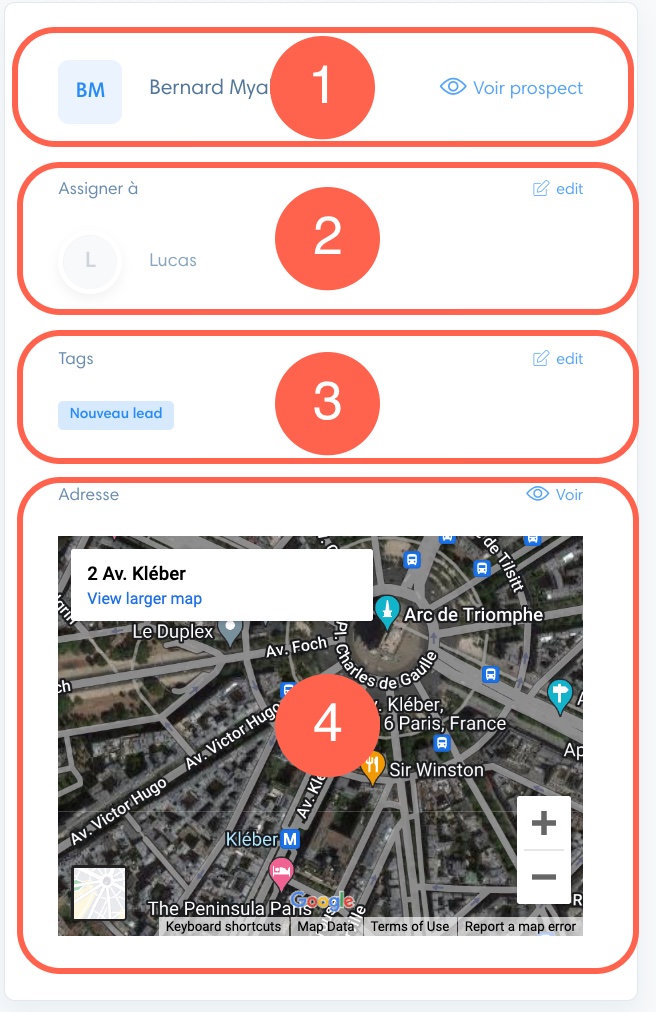
- View prospect: click on “View prospect” to go to the prospect’s CRM file.
- Assign to : you can assign a user to this prospect. Simply click on “edit” and select a user.
- Tags: you can add, edit and delete tags that are associated with the prospect.
- Address: you can view the prospect’s address in Google Maps
