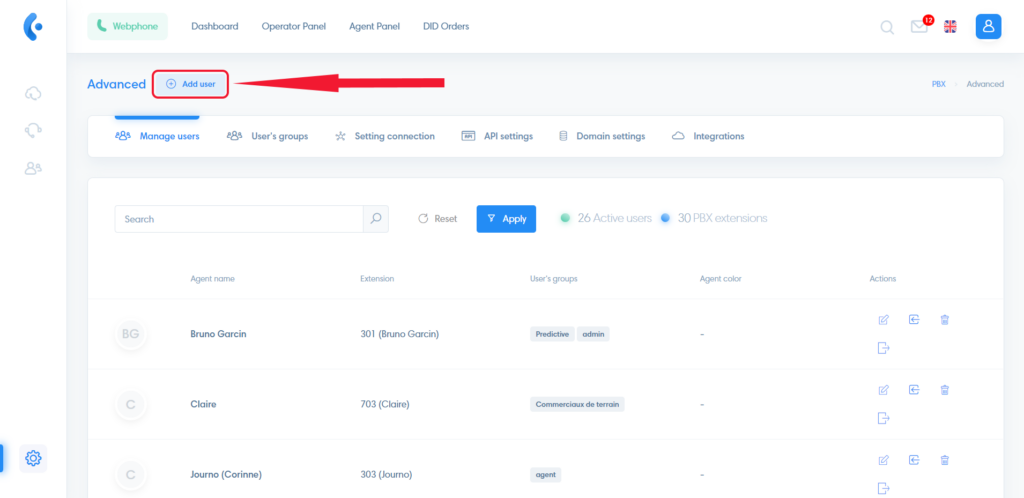
To access the “Manage users” section, you simply have to click on the icon of “Advanced settings” .
Add user
To create a user click on the “Add user” button.
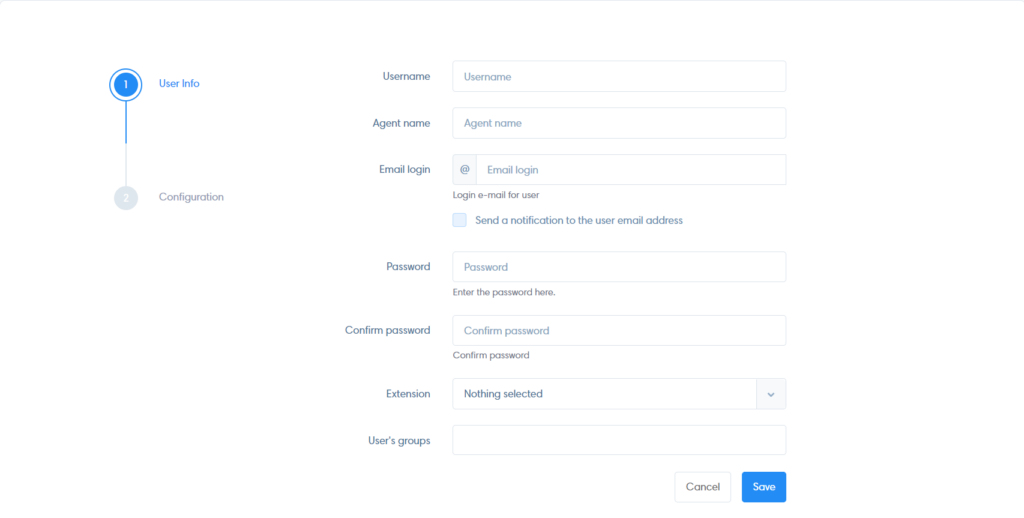
Complete the “User Info” section
- Username: Kavkom user ID
- Agent name: the username
- Email login: the email assigned to the user, it will also be used to connect Kavkom account. Check the box below to send the accesses to the user
- Password: 8 characters minimum
- Extension: phone line assigned to the agent
- User’s group: By assigning a user to a group, you assign them permissions.
Then, click on “2 Configuration” on left.
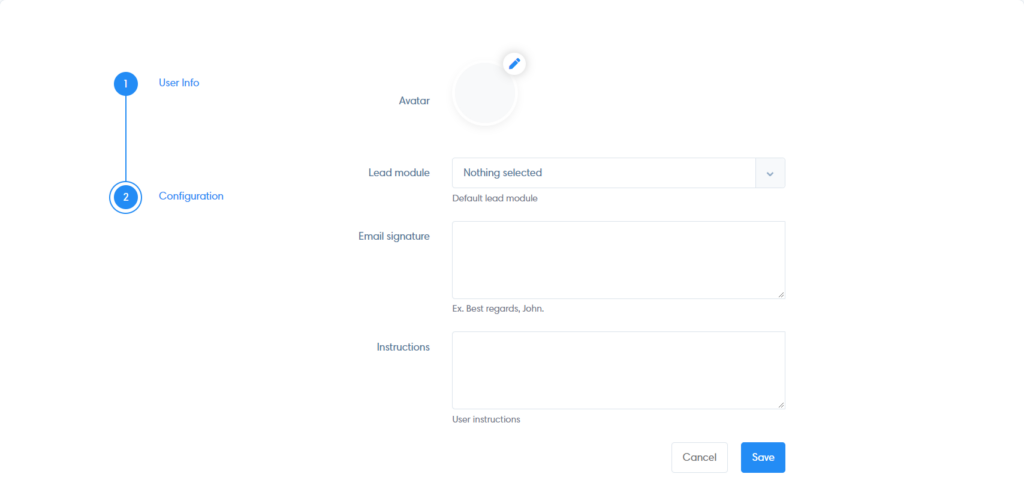
Complete the “Configuration” section
- Avatar: you can add an image for the user
- Lead module : choose which modules this user will have access to
- Email signature: this is the personalized signature that will be displayed at the end of his communications
- Instructions: you can add instructions for the user
When you are done, click on “Save” button.
Note
Add HTML text to add an image in the signature
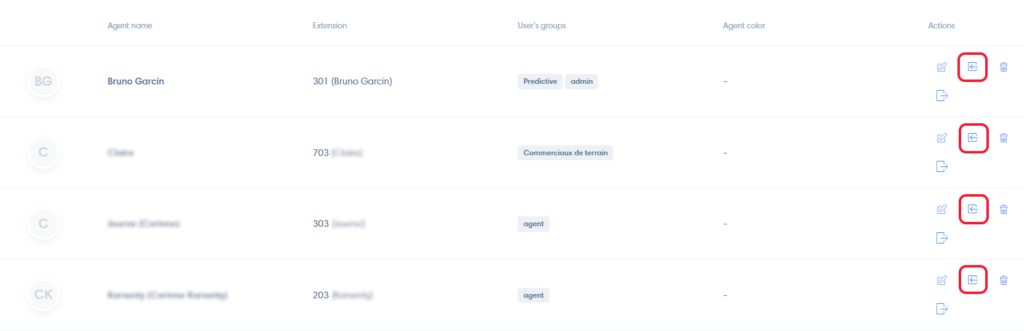
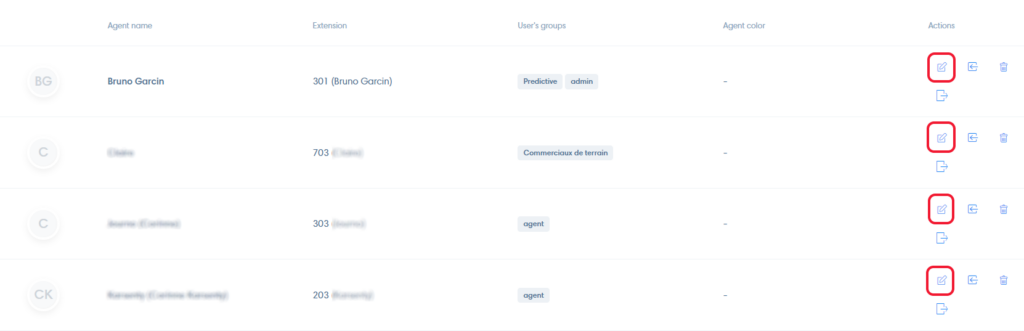
User Actions
Modify a user
To edit a user, click on the edit icon in the “Actions” column.
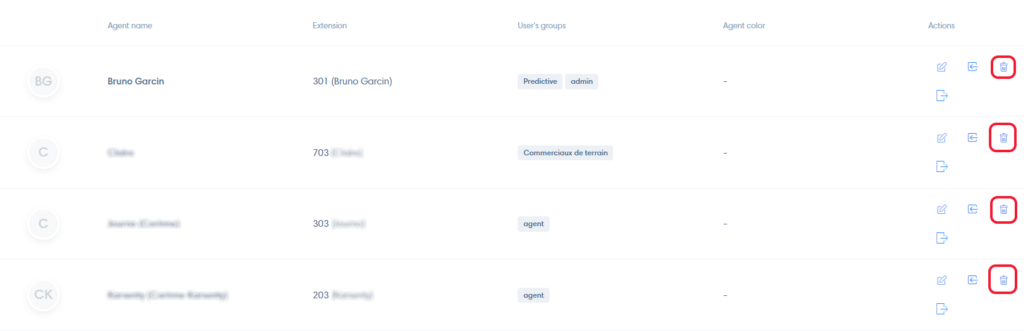
Delete a user
Click on the trash icon, in the “Actions” column.
Login as another user
Log in as another user’s account by clicking the “Log in as this user” icon.