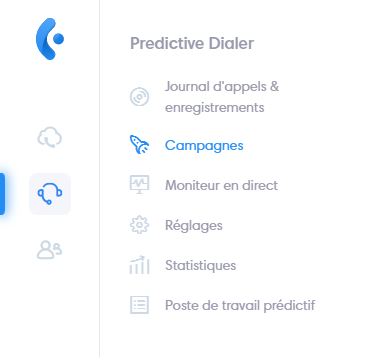
To access the predictive campaign manager, click on “Campaigns” in the menu bar.
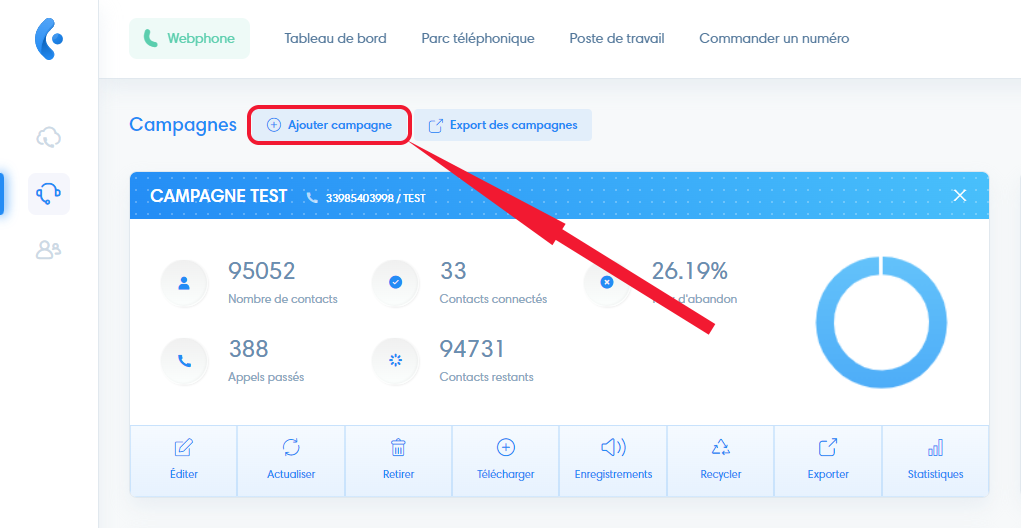
Click on “Add campaign” and a window will open.
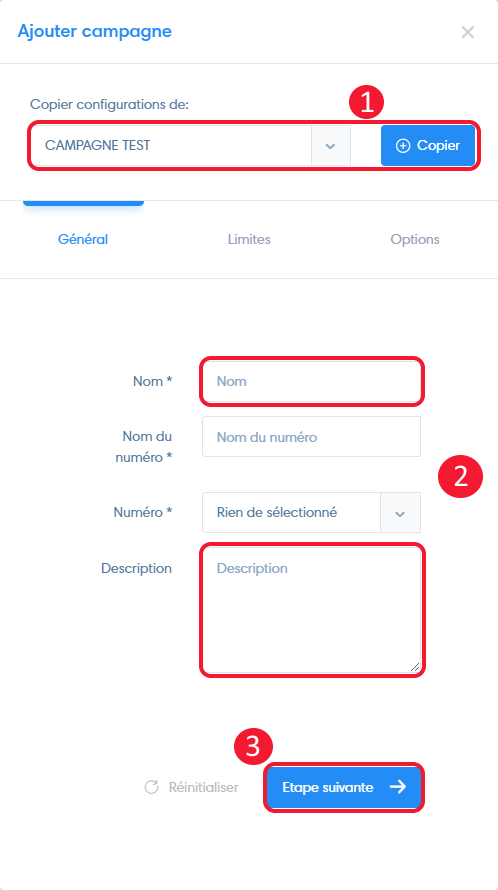
Settings from an existing campaign
When you open your services, our teams create a campaign template based on your configuration and requirements. We recommend that you use this template to create your campaigns.
- You can load the settings of an existing campaign by selecting it and clicking on “copy”.
- If necessary, modify the name and description.
- Click on “Next step” until you can click on “Save campaign”.
Create a campaign with new parameters
General
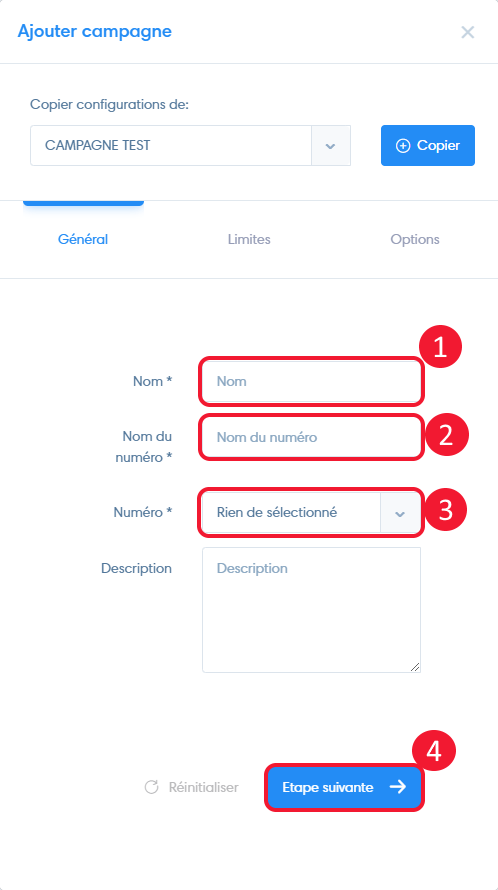
- Enter the campaign name,
- Enter the name that will be displayed on the prospect’s phone when the call is made,
- Select the telephone number used to make calls
- Then click on “Next step”.
Limits
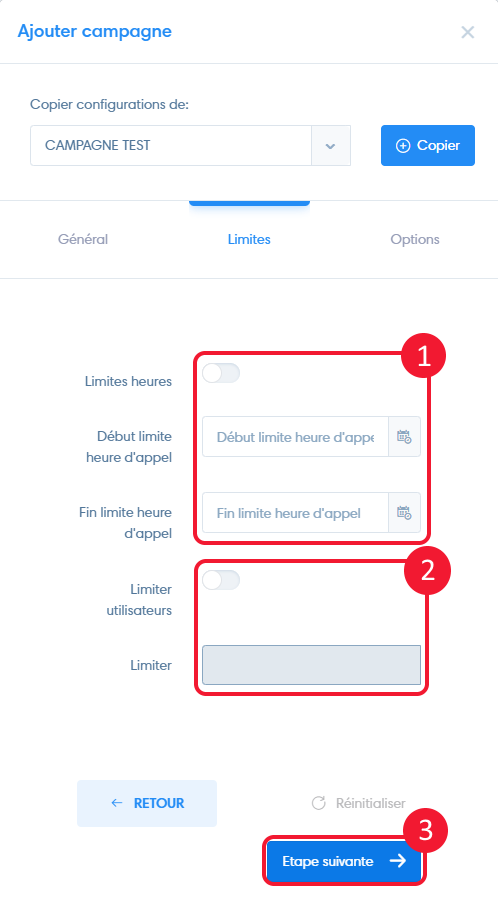
- Limit hours: Activate this option to limit calls to a certain time slot, setting the start and end of the call limit.
- Restrict to : activate this option to restrict the campaign to certain users. The campaign will be invisible to unselected users.
- Then click on “Next step”.
Options
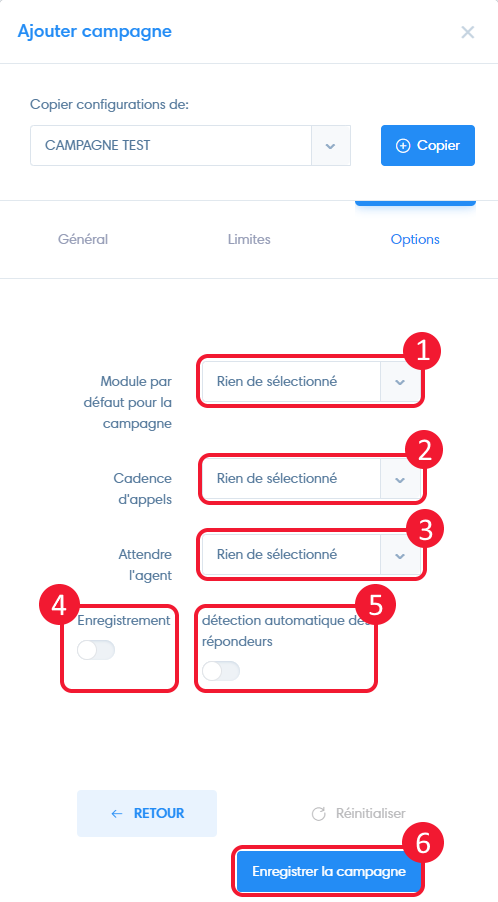
- Campaign default module : select the CRM module to which leads will be sent from the predictive. Selecting nothing allows you to choose the module when sending.
- Override : number of numbers dialed simultaneously by agents
- Wait for agent : select the time between two conversations
- Turn on “Record” to enable call recording
- Activate “Answering Machine Detection” to avoid answering machines
- Finalize creation by clicking on “Register campaign”.
Your campaign is now created. To find out how to add leads to your campaign, go to the article “Adding leads to a predictive campaign”.

