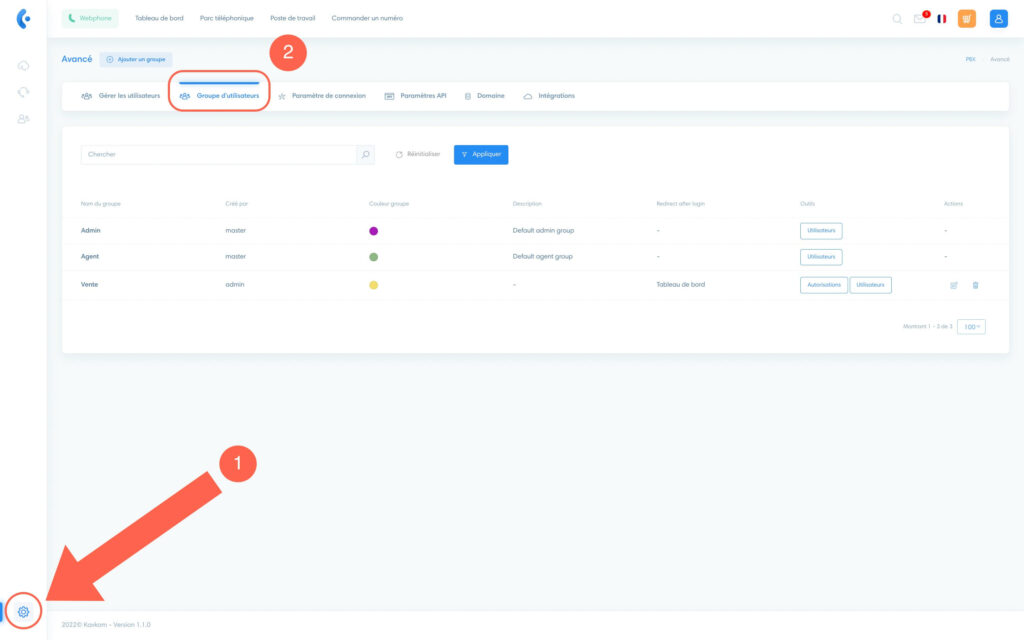
To know User groups enable you to assign authorizations to users.
User groups access
(1) Click on “Advanced settings”
(2) Click on “User group”.

Understanding default groups
Default groups have predefined parameters: you cannot change them.
There are two default groups:
- The Admin group : users in an Admin group have all authorizations.
- Agent group : users in an Agent group have restricted access to settings.
Note We do not recommend using the agent group if you wish to have a personalized visual for your users.
Create a user group
Good to know You can customize the permissions of groups you’ve created (as opposed to default groups).
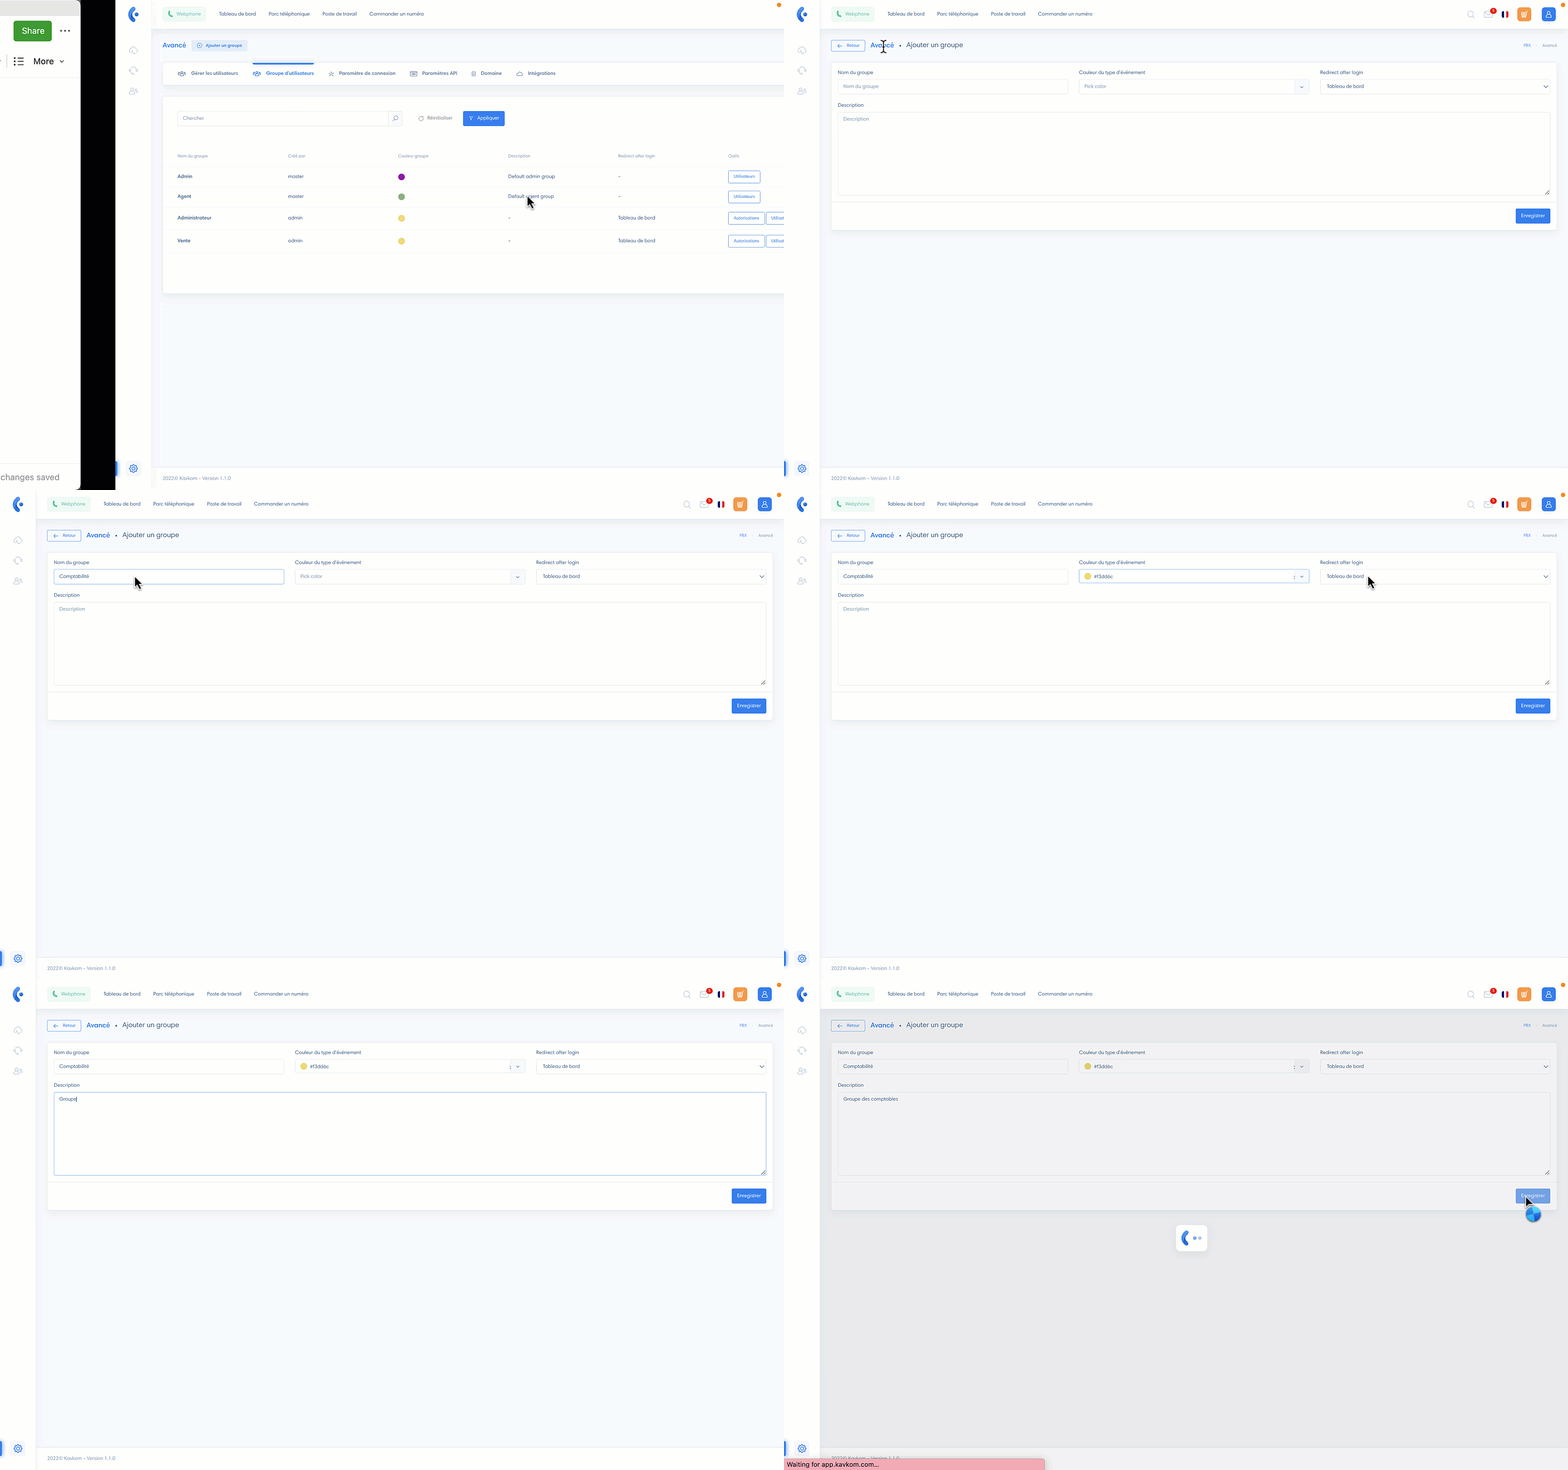
Click on “Add a group” to create a new user group.
Then fill in the following fields :
- Group name
- Event type color
- Redirect after login : this field specifies the page to which members of this group will be redirected when they log in to Kavkom.
Here are some examples of groups you can create : Sales, Support, Administrative, Accounting, Telesales, Technicians, etc.
Assign and remove users from a group
From the “User group” section
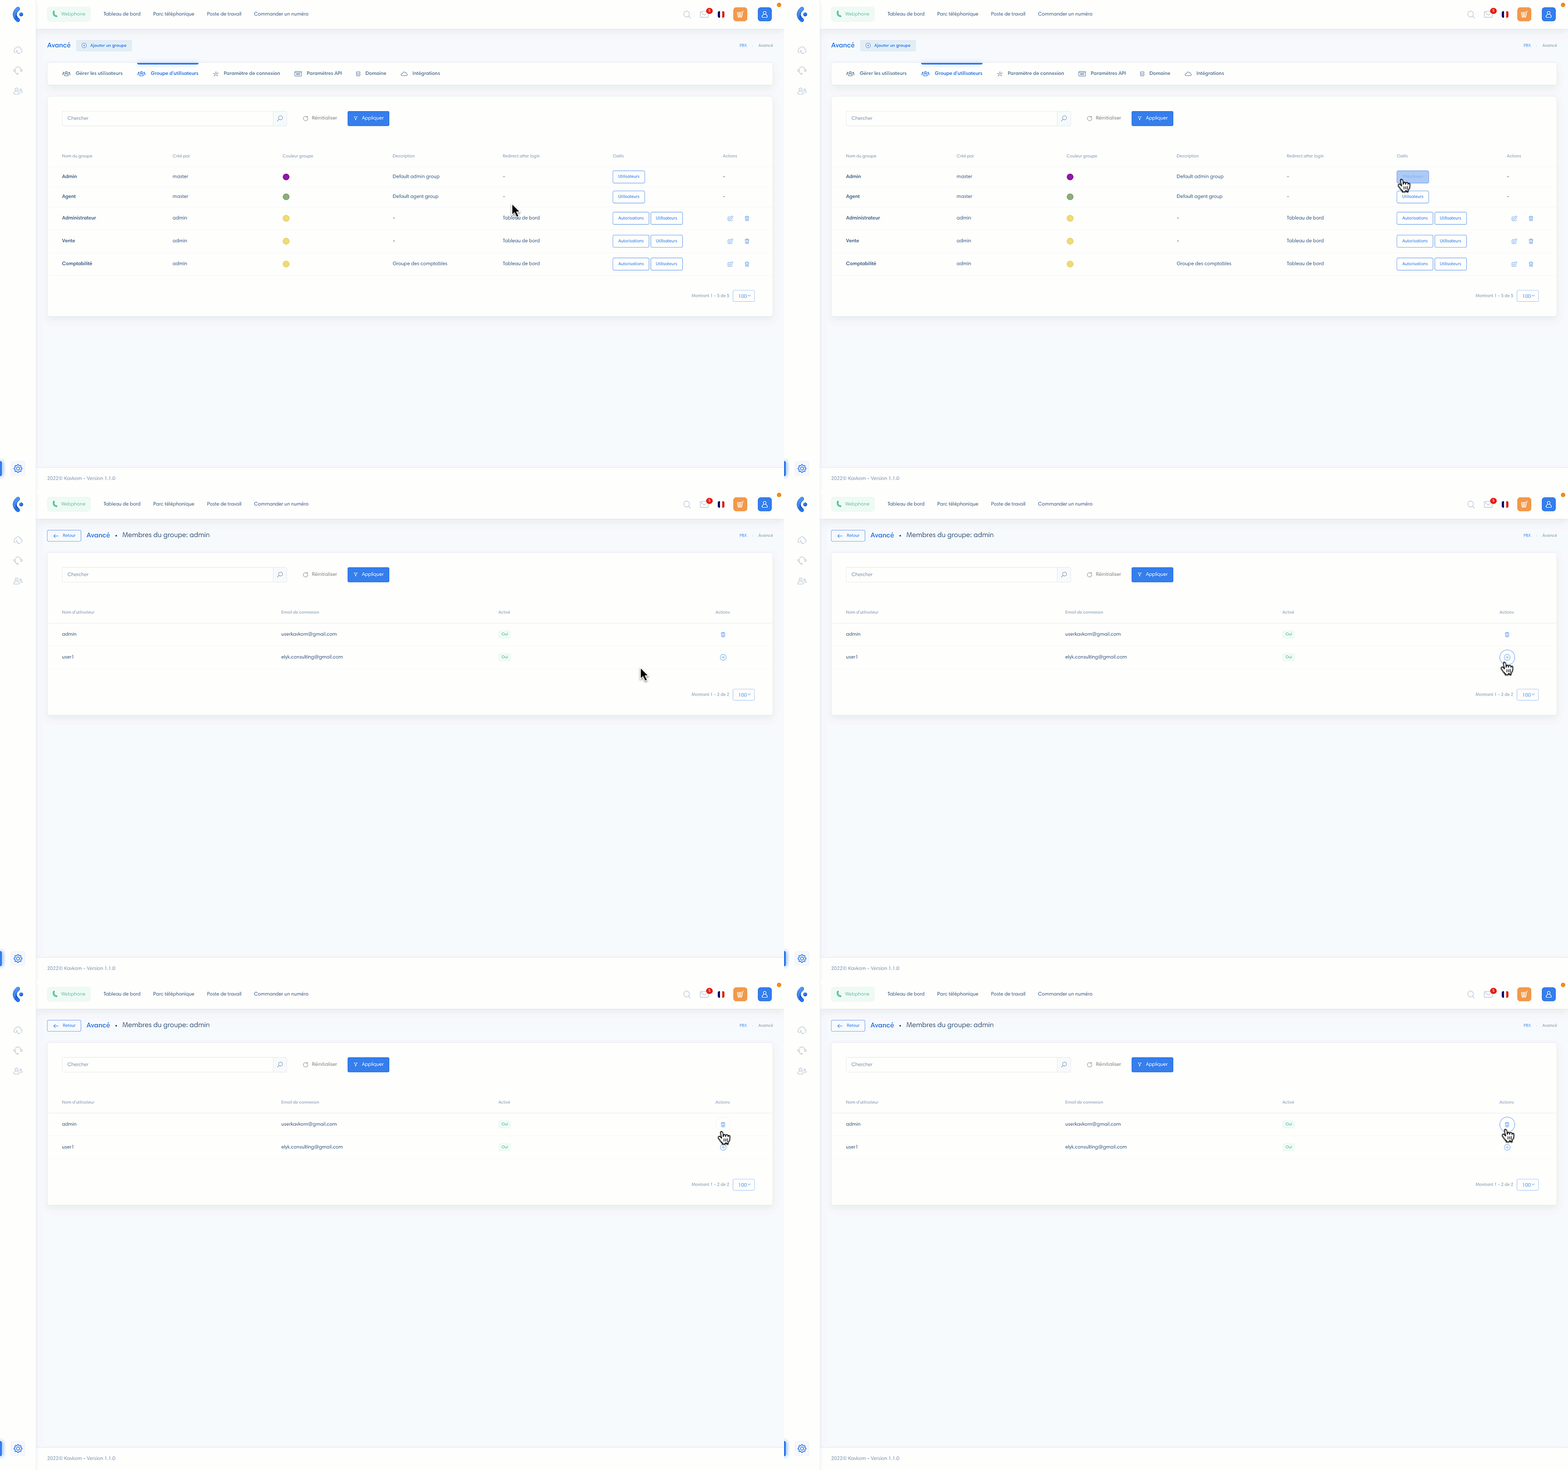
To assign users to a group, click on “Users” in the “Tools” column. Make sure you’re on the right group line.
Once in the “Group members” section, turn your attention to the action column:
- + icon: if this icon appears, it means that the user is not part of the group. Click on it to add him/her.
- “Trash” icon : click to delete the user from the group
Note If added users are not displayed, please refresh your page.
From the “Manage users” section
You can also add and delete users in a group from the “Manage users” section.
To find out more, go to the “Managing users” article.
Manage user group permissions
Find out more about authorizations in the article: Manage authorizations


