
This menu allows you to customize the settings for each user according to your needs. If you encounter any difficulties, please contact our support team for assistance.
To access user settings, go to the administrator area by clicking on the corresponding icon at bottom left.

- Edit account (name, login information, privileges, number displayed for manual calls and transfers)
- Connection method (integrated WebPhone, SIP phone, SIP address or Dial-in)
- Delete user permanently (irreversible)
- View user’s recent calls
- Customize sales pitches (see“Call scripts” article).
- Edit phone book for call transfers (see“Call transfers“).
- View list and recordings of user manual calls
- Sound files for playback during a call (see“Playing sound during a call“).
- Customize email templates (see“Sending emails” article).
Edit account
User information

- User name
- Login ID
- Email address used for sending emails
- Name displayed during a call
- Number displayed for manual calls
- Change login password
- Post URL (see article“Send qualified leads to your CRM“)
Privileges
You can grant different authorizations to each user. By ticking the boxes, you activate the corresponding authorizations for the chosen user.
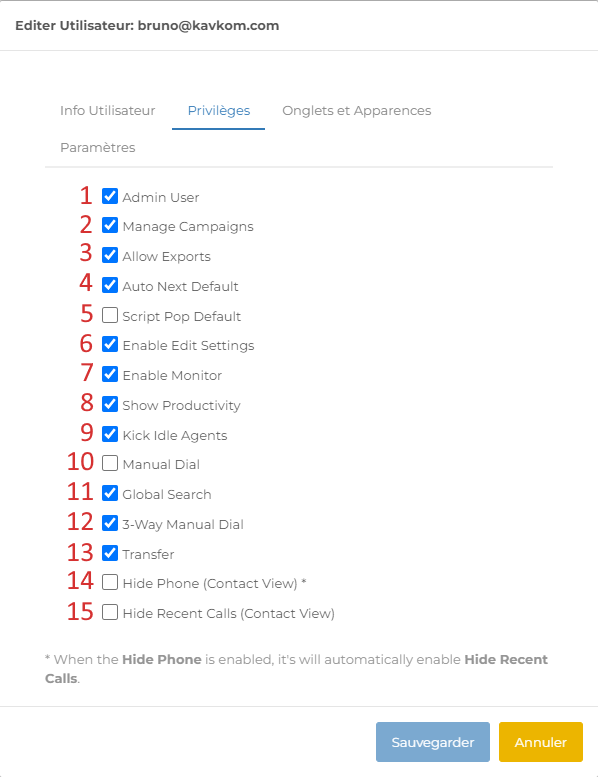
- Admin User: activate administrator permissions
- Manage Campaigns: campaign management
- Allow Exports: export files and contact lists
- Auto Next Default: automatically switches to the next call after qualification
- Script Pop Default: automatic display of sales pitch/script
- Enable Edit Settings: access to settings
- Enable Monitor: access to the monitor agent
- Show Productivity: access to agent productivity
- Kick Idle Agents: expel inactive agents
- Manual Dial: manual calls
- Global Search: contact search
- 3-Way Manual Dial: conference mode
- Transfer : transfer
- Hide Phone: hide the prospect’s number
- Hide Recent Calls: hide recent calls
Tabs and skins
The “Tabs and Appearances” section lets you show or hide Dialer functions for the corresponding user. Simply tick to show and untick to hide.
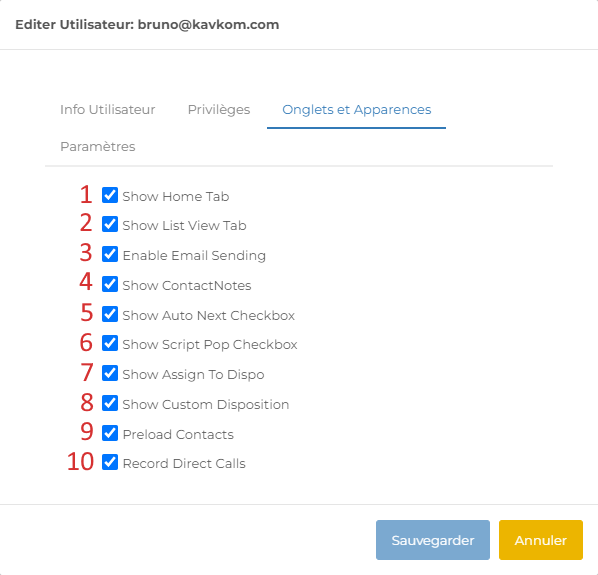
- Show Home Tab: dashboard display
- Show List View Tab: display the “List” menu
- Enable Email Sending: display the email sending button
- Show Contact Notes: display contact notes
- Show Auto Next Checkbox: display the checkbox for enabling/disabling automatic switching to the next call after qualification
- Show Script Pop Checkbox: display the checkbox for enabling/disabling automatic display of the sales pitch/script
- Show Assign to Dispo: display the button for assigning the contact to another user
- Show Custom Dispo: display custom qualifications
- Preload contacts :
- Records Direct Calls: display the manual call recording on/off button
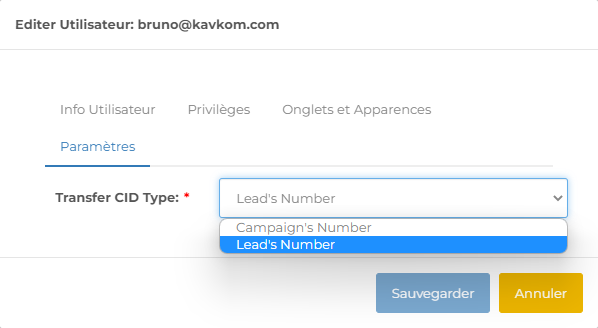
Parameters
The “Transfer CID Type” parameter lets you display either the campaign number or the contact number during a transfer, as required.
Connection method
The connection method corresponds to the way and hardware you want to use for calls. For example, you can use a softphone, an IP phone, the built-in Webphone, or any other compatible hardware. If you select a method other than Webphone, you’ll need to configure the extension for each corresponding user.
Dial-In telephone
The user will use a telephone line to dial our local access number when a connection is required. Users will be asked to enter a unique identification number and PIN that identifies the caller as a user on our system. This option offers excellent telephone quality but may incur additional telephone charges.
SIP Phone
The user has a SIP phone, either soft (X-Lite, Zoiper, 3CX, MicroSIP…) or physical (Cisco, Linksys…). Unique information must be entered in the user’s SIP device. Make sure the phone registers successfully before launching calls.
SIP Address
The user has a SIP extension on an existing telephone system. The dialer initiates a SIP call to the SIP account displayed from the corresponding server when a connection is required. This is an advanced option and users should consult their PBX administrator before trying this method.
Webphone
This connection method uses the computer’s speaker and microphone, or the headset via your Web browser. WebPhone requires high bandwidth. If you encounter audio problems, you’ll want to return to the SIP Phone method.
Delete user
By clicking on the cross, you permanently remove the user from your server. This action is irreversible.
