
You can import one or more contact files into each campaign. There is no limit on size, number of contacts or number of files.
Files will be processed in the order of insertion.
Access to campaigns
Go to the “Campaigns” menu(1) then click on the “+” icon (2).
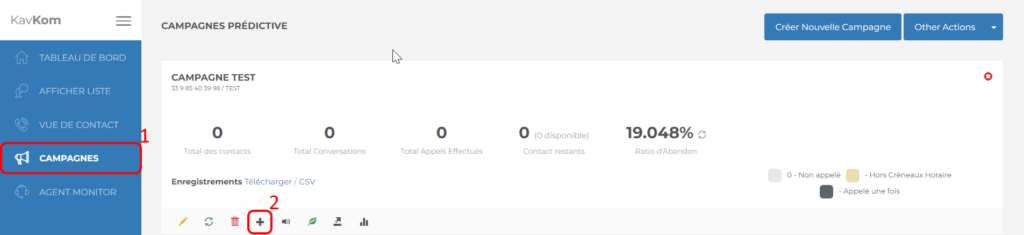
A window opens.
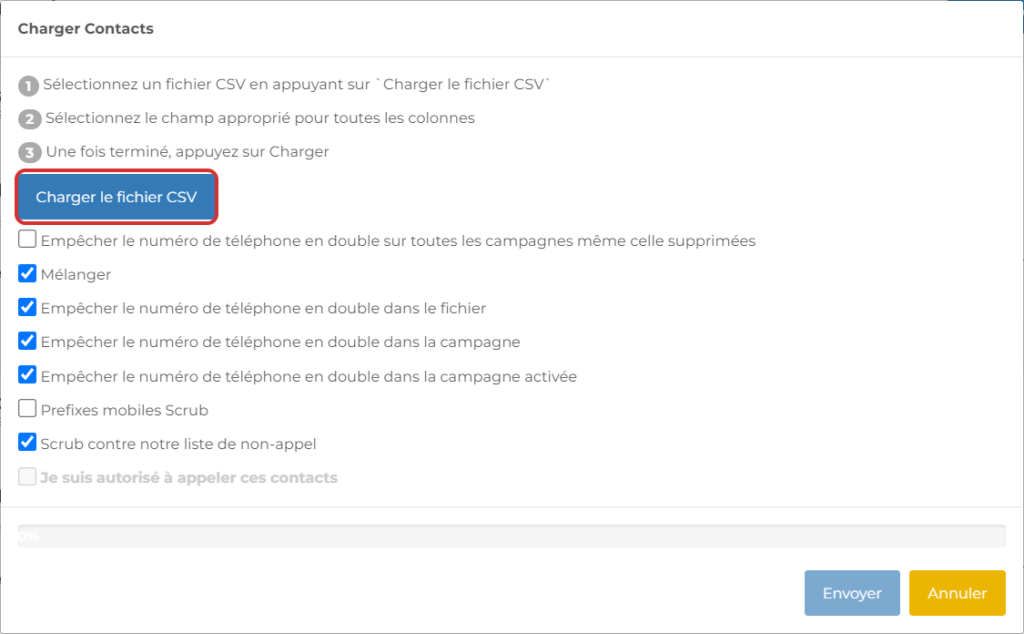
Select file
Click on the “Load CSV file” button and select the file.
Please note
The file must be in CSV format and meet certain conditions. After selecting the file, a preview will allow you to check the file.
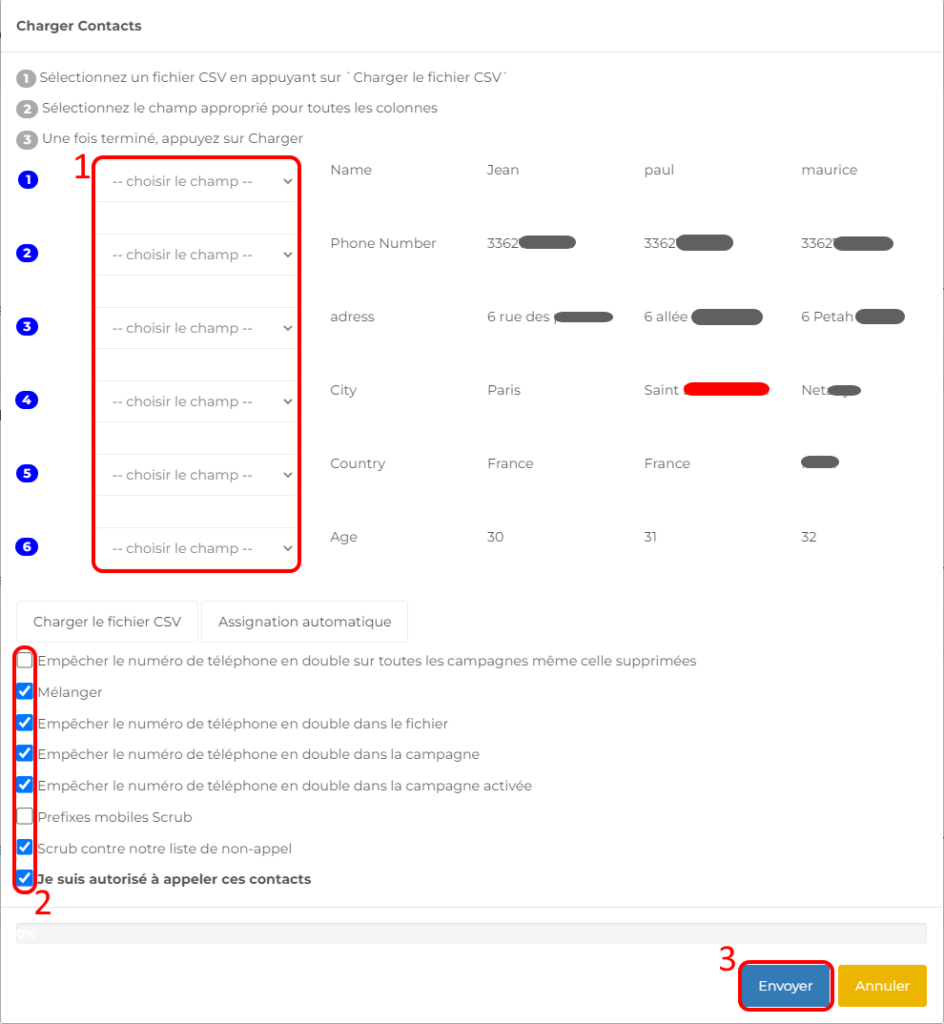
Data fields
Read this article to find out how to customize data fields.
- Match the predictive data fields with those in the file by selecting from the drop-down menu.
- Check the boxes as indicated:
– Mix, Prevent duplicate phone number in file
– Prevent duplicate phone number in campaign
– Prevent duplicate phone number in activated campaign
– Scrub against our no-call list
– I am allowed to call these contacts - Click on “Send”.
The campaign can take up to 10 minutes to update, depending on the file inserted.
Once the file has been imported, the campaign should look like the illustration below, and is ready.

