
Dialer Kavkom supports one-click e-mailing in HTML format.
Each user is able to send emails when a contact is displayed in the “Contact View” and if functionality is activated for that user.
Sending e-mails with contact information is possible using variables.
Feature activation
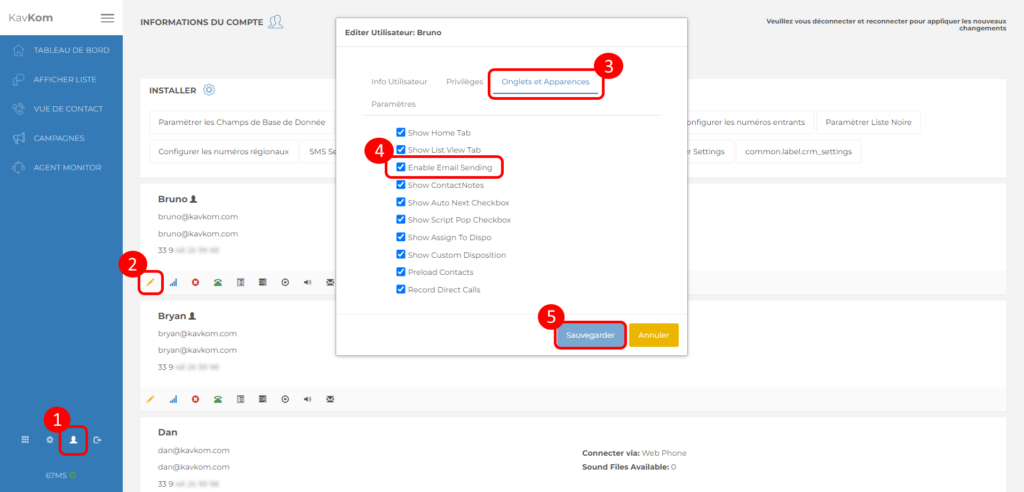
First, make sure that sending emails is authorized for the agents concerned.
To do this, go to the administration area (1), click on the pencil (2), then on the “Tabs and Appearances” tab (3), check “Enable Email Sending” (4) then “Save” (5).
Once the functionality has been activated for the users concerned, we’ll create templates for each of them.
Creating email templates
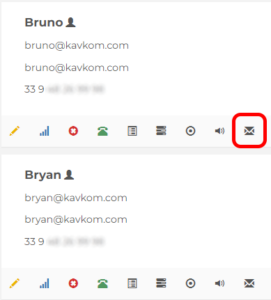
To configure email templates, click on the email icon in the administrator area.
A popup window opens:

- In the “Name” field: enter the name of the template (which will be used as the object when sending)
In the “Content” field: add the content
Click on “Add Email Template” to save it.
Scripts with contact information can be created by using the #{} in the script content. For example, if the e-mail is to begin with “Hello Jean, I’m Jeanne from the company…” and the database field name is “Name” (case-sensitive), the script will read “Hello #{Name}, I’m Jeanne from the company…”. - List of email templates
Click on the cross to delete the template or on the template name to edit it. - Personalize the sender’s email address. Prospects will receive emails from this address.
Sending emails
Once the email settings have been made, here’s how users can send emails.
When a contact is displayed in the “contact view”, click on the mail button:
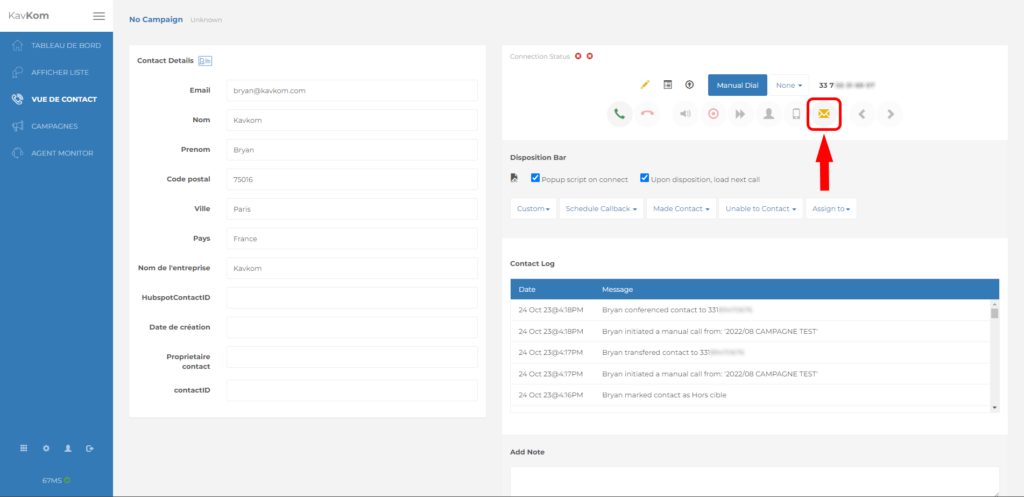
A popup appears:
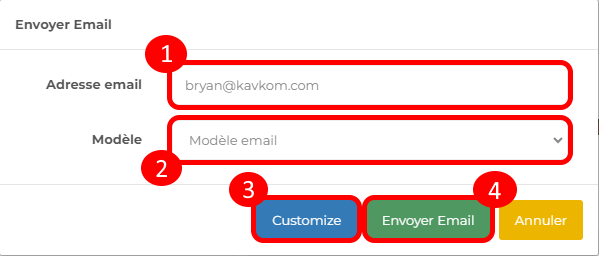
- Enter or modify recipient address
- Email template selection
- Modify email
- Send email
You know all about sending emails with Dialer Kavkom!
