
Kavkom CRM lets you import contact files. Like most systems, it only works with comma-separated CSV files. In this tutorial, we’ll explain why, and guide you through converting Excel data to comma-separated CSV.
Why convert an Excel file to CSV
Before we show you how to convert an Excel file to CSV, you should first understand why Kavkom solutions only work with CSV files and why this is important. Here are the most important reasons to convert an Excel file to CSV file format:
- The CSV format is a very simple format that is compatible with all spreadsheet and database systems;
- Thanks to the CSV format, you can easily transfer data between different software and applications;
- As CSV files contain plain text, they enable Web developers to create, develop and organize large amounts of data, and import data into an Excel sheet or database.
Below is a step-by-step process for converting an Excel workbook to CSV format using OpenOffice or Microsoft Excel.
How to convert an Excel file to CSV
With LibreOffice
For ease of use, we recommend LibreOffice, which you can download free of charge from the publisher’s website.
Start by opening the file with LibreOffice.
Delete +.
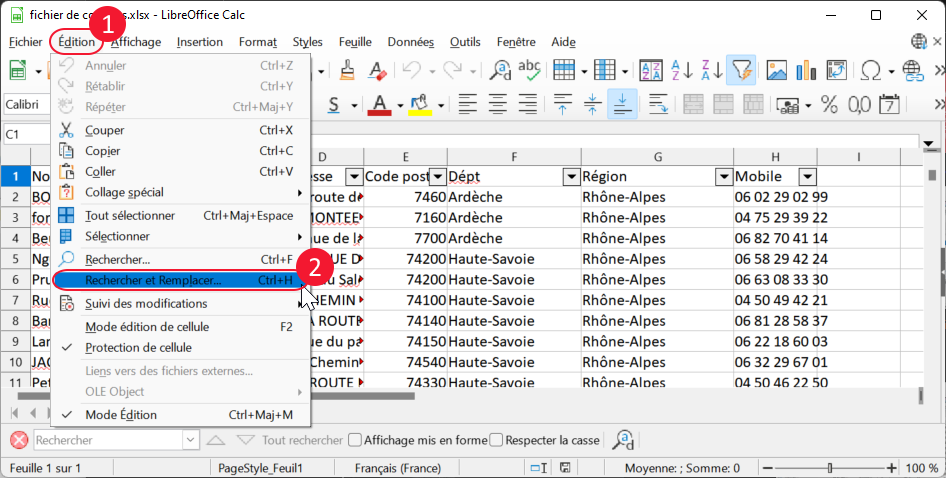
The format of numbers imported into Kavkom must include the country code without the +. If the numbers in your file start with a +, delete them by opening the “Edit” menu (1) then “Find and replace” (2).
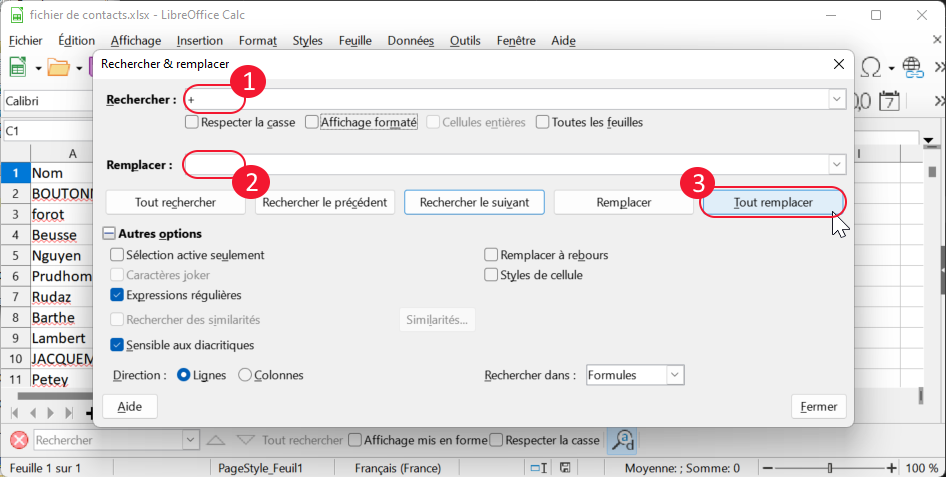
In the “Search” field, type a “+” (1) and in the “Replace” field, leave the field blank, click on the “Replace all” button (3) then close the window.
Save as CSV
Open the “File” menu (1) and click on “Save as”.

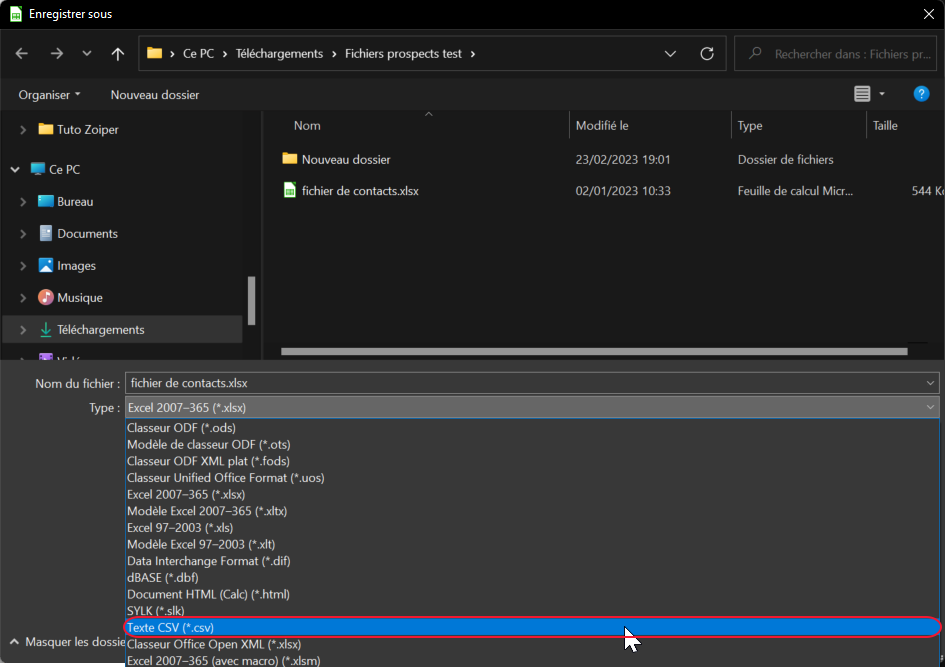
In type, select “Text CSV” then click on “Save” at bottom right.
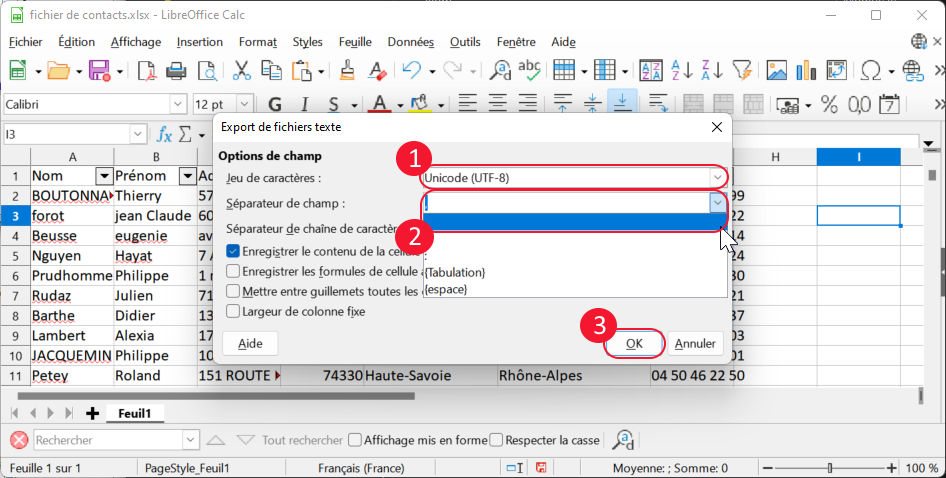
In the “Export text files” window, for Character set select “Unicode (UTF-8)” (1) and for Field separator select the comma (2) then click “OK” (3).
Your file is now ready to be imported into your Kavkom solution.
If you need help, please contact our support team.
With Excel
First open the Excel workbook you wish to export.
Save Excel file as CSV
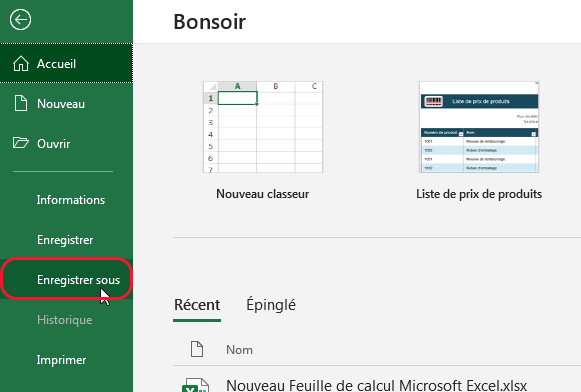
Go to the “File” menu, then click on the “Save as” command in the left-hand sidebar. Alternatively, press the “F12” key on your keyboard to open the same “Save As” dialog box.
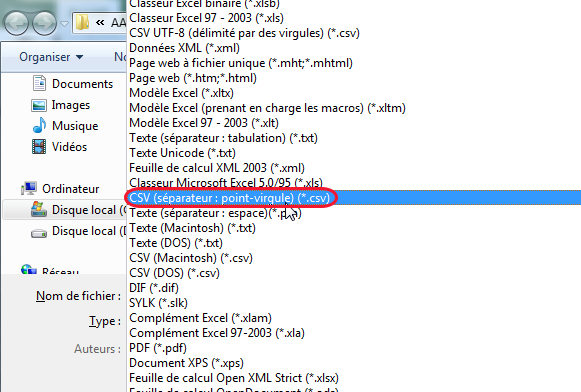
In the “File type” drop-down list, choose to save your Excel file in “CSV (semicolon separator) (*.csv)” format, as shown in the screenshot below. This file format saves the Excel spreadsheet as semicolon-separated text that can be used in another Windows program or another version of the Windows operating system.
Then find and select the folder in which you wish to place your Excel file in CSV format, and click on the “Save” button to finish.
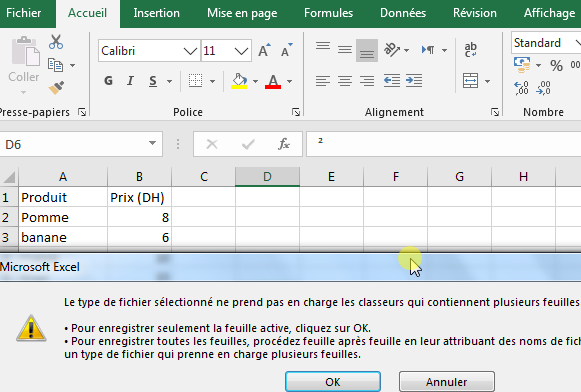
When you click on “Save”, Excel will display the dialog box shown in the screenshot below. Don’t worry, this is not an error message. In fact, when you save an Excel workbook in CSV format, it will only save the currently active worksheet. Here we distinguish between two cases.
– If you wish to convert all the sheets in your Excel workbook to CSV format, click on “OK”.
– Alternatively, if you want to export the contents of all the sheets in your workbook, click on the “Cancel” button, then save each worksheet individually as a separate workbook. Then convert each Excel file to CSV format.
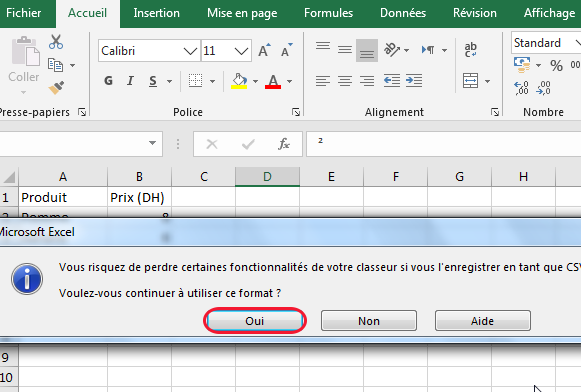
When you click on “OK” in the first dialog box, a second dialog box (shown in the screenshot below) opens, informing you that your spreadsheet may contain features not supported by CSV encoding. Simply click on “Yes”.
Open the CSV file in a text editor
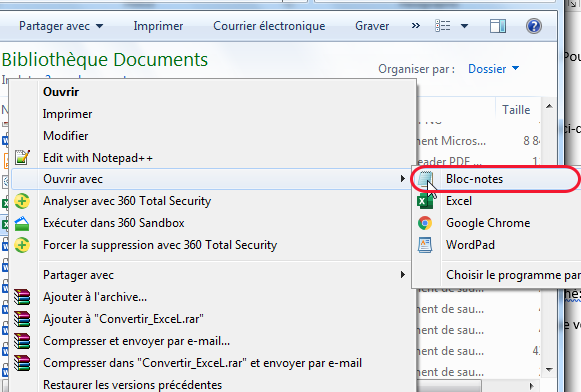
Now, to open the CSV file and view its contents, right-click on it, select “Open with” from the context menu and then choose “Notepad” or any other preferred text editor.
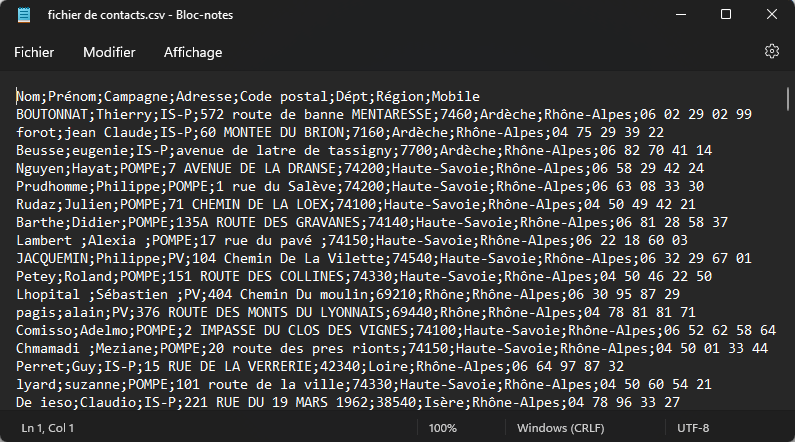
Once you’ve opened the file, you’ll see that the data in each cell is separated by a semicolon between them, and you’ll get a result as shown in the screenshot below.
Clean file
However, our aim was to convert the Excel spreadsheet into a comma-separated CSV file. So we need to replace all semicolons with commas. To do this, proceed as follows with Notepad:
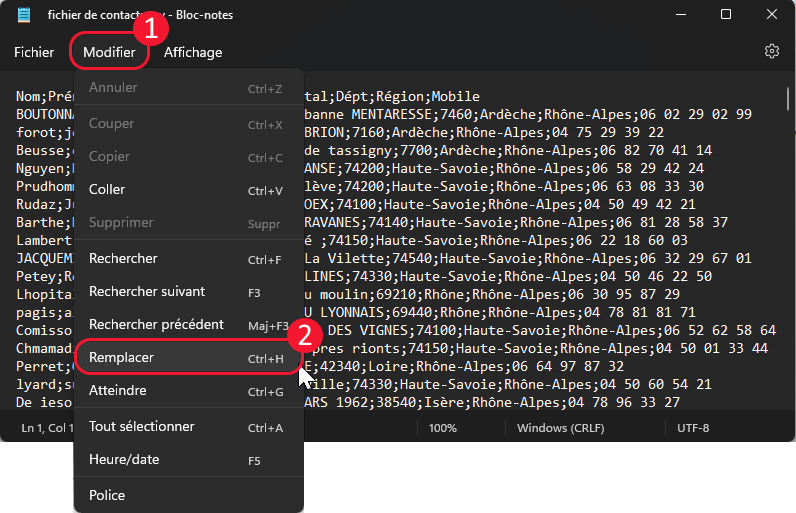
Select “Modify” (1) then “Replace” (2) to open the dialog box.
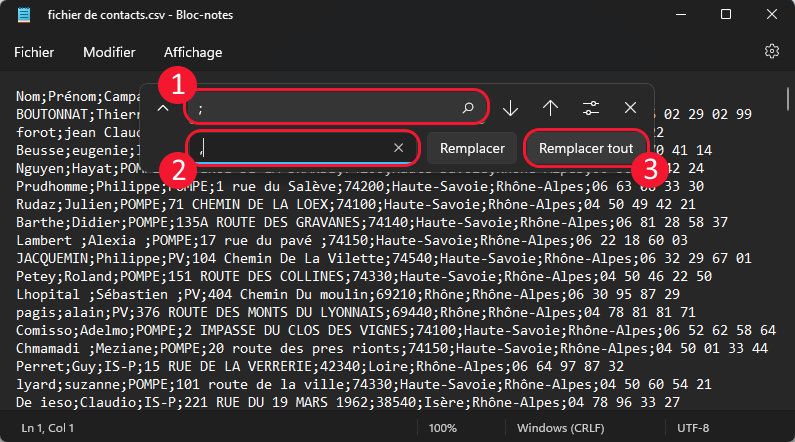
In the “search” field, type a semicolon (1), in the “replace with” field type a comma (2) and click on “Replace all” (3).
Since the format of numbers imported into Kavkom must include the country code without the +, you can delete them using the same technique, replacing all +’s with nothing.
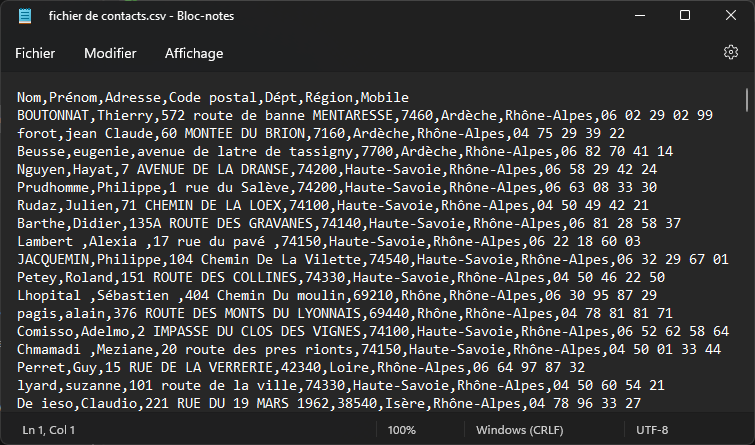
The resulting file should look like this:
In the “File” menu, click on “Save”.
You can then open the CSV file from Excel and check that the data is correct.
Your file is now ready to be imported into your Kavkom solution.
If you need help, please contact our support team.
