
The “Leads” section lets you manage Kavkom CRM Leads.
To access it, click on the CRM icon, then on “Leads”.

Add Lead
To add a prospect manually, click on “Create lead”.

Then fill in the fields :

A phone number is required.
Warning When inserting a number, don’t add spaces, don’t add a “plus” before the area code, and make sure you’ve added the country code. Here’s an example of a number in the right format: “15550505050”.
Advanced search
“Advanced Search” lets you filter search results and export them.
- Choose filters and click “Apply” to display search results
- You can then export the results by clicking on “Export leads”.
- Reset filters to view and/or export all your leads
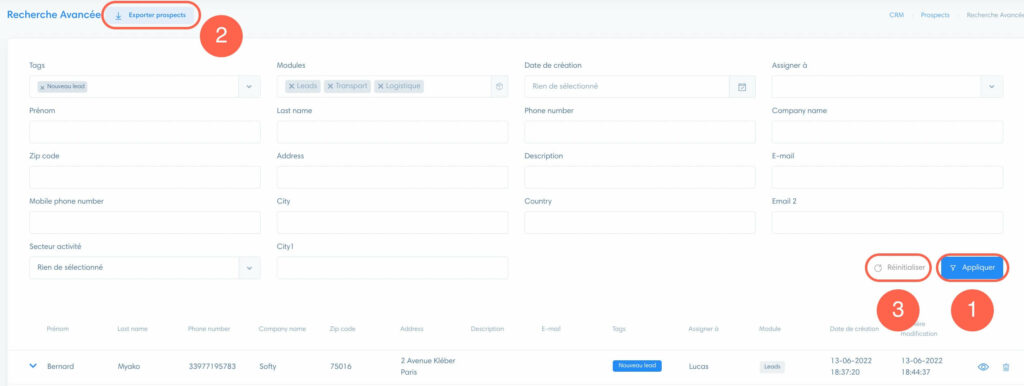
Note If you wish to export all leads, it’s a good practice to reset the filters before launching the export.
Modules
Modules are “folders” that allow you to categorize your leads according to a particular feature.
Find all your modules in the section below:

To know The “Leads” module is Kavkom’s default module.
To learn how to create a module, go to the dedicated article: “Configuring a module”.
To restrict module access to certain users, go to the article on authorizations: “Managing authorizations”.
Use the leads table
Go to the lead’s file
Click on the “eye” icon on the lead’s line.

Understanding filters
You can filter the list of prospects within a module :
- Search : make a manual search
- Tags : filter by tags
- Date : filter for a time interval
- Assign to : filter by assigned user
- Saved filters : choose a saved filter

Use saved filters
Then, to add a saved filter :
- Choose filters
- Click saved filter
- Name the filter and save

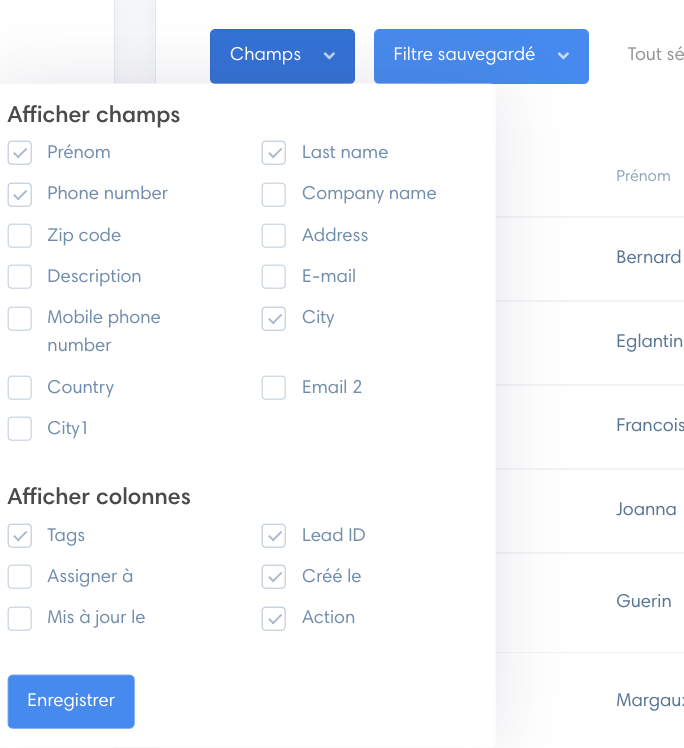
Change column display
Click on “Fields”, select the columns you want to display and save.
Modify leads from the prospect section
Select leads
To select a lead, click on its box in the first column of the table. You can select more than one lead.

To select all lead, click on the box next to the table column headings.

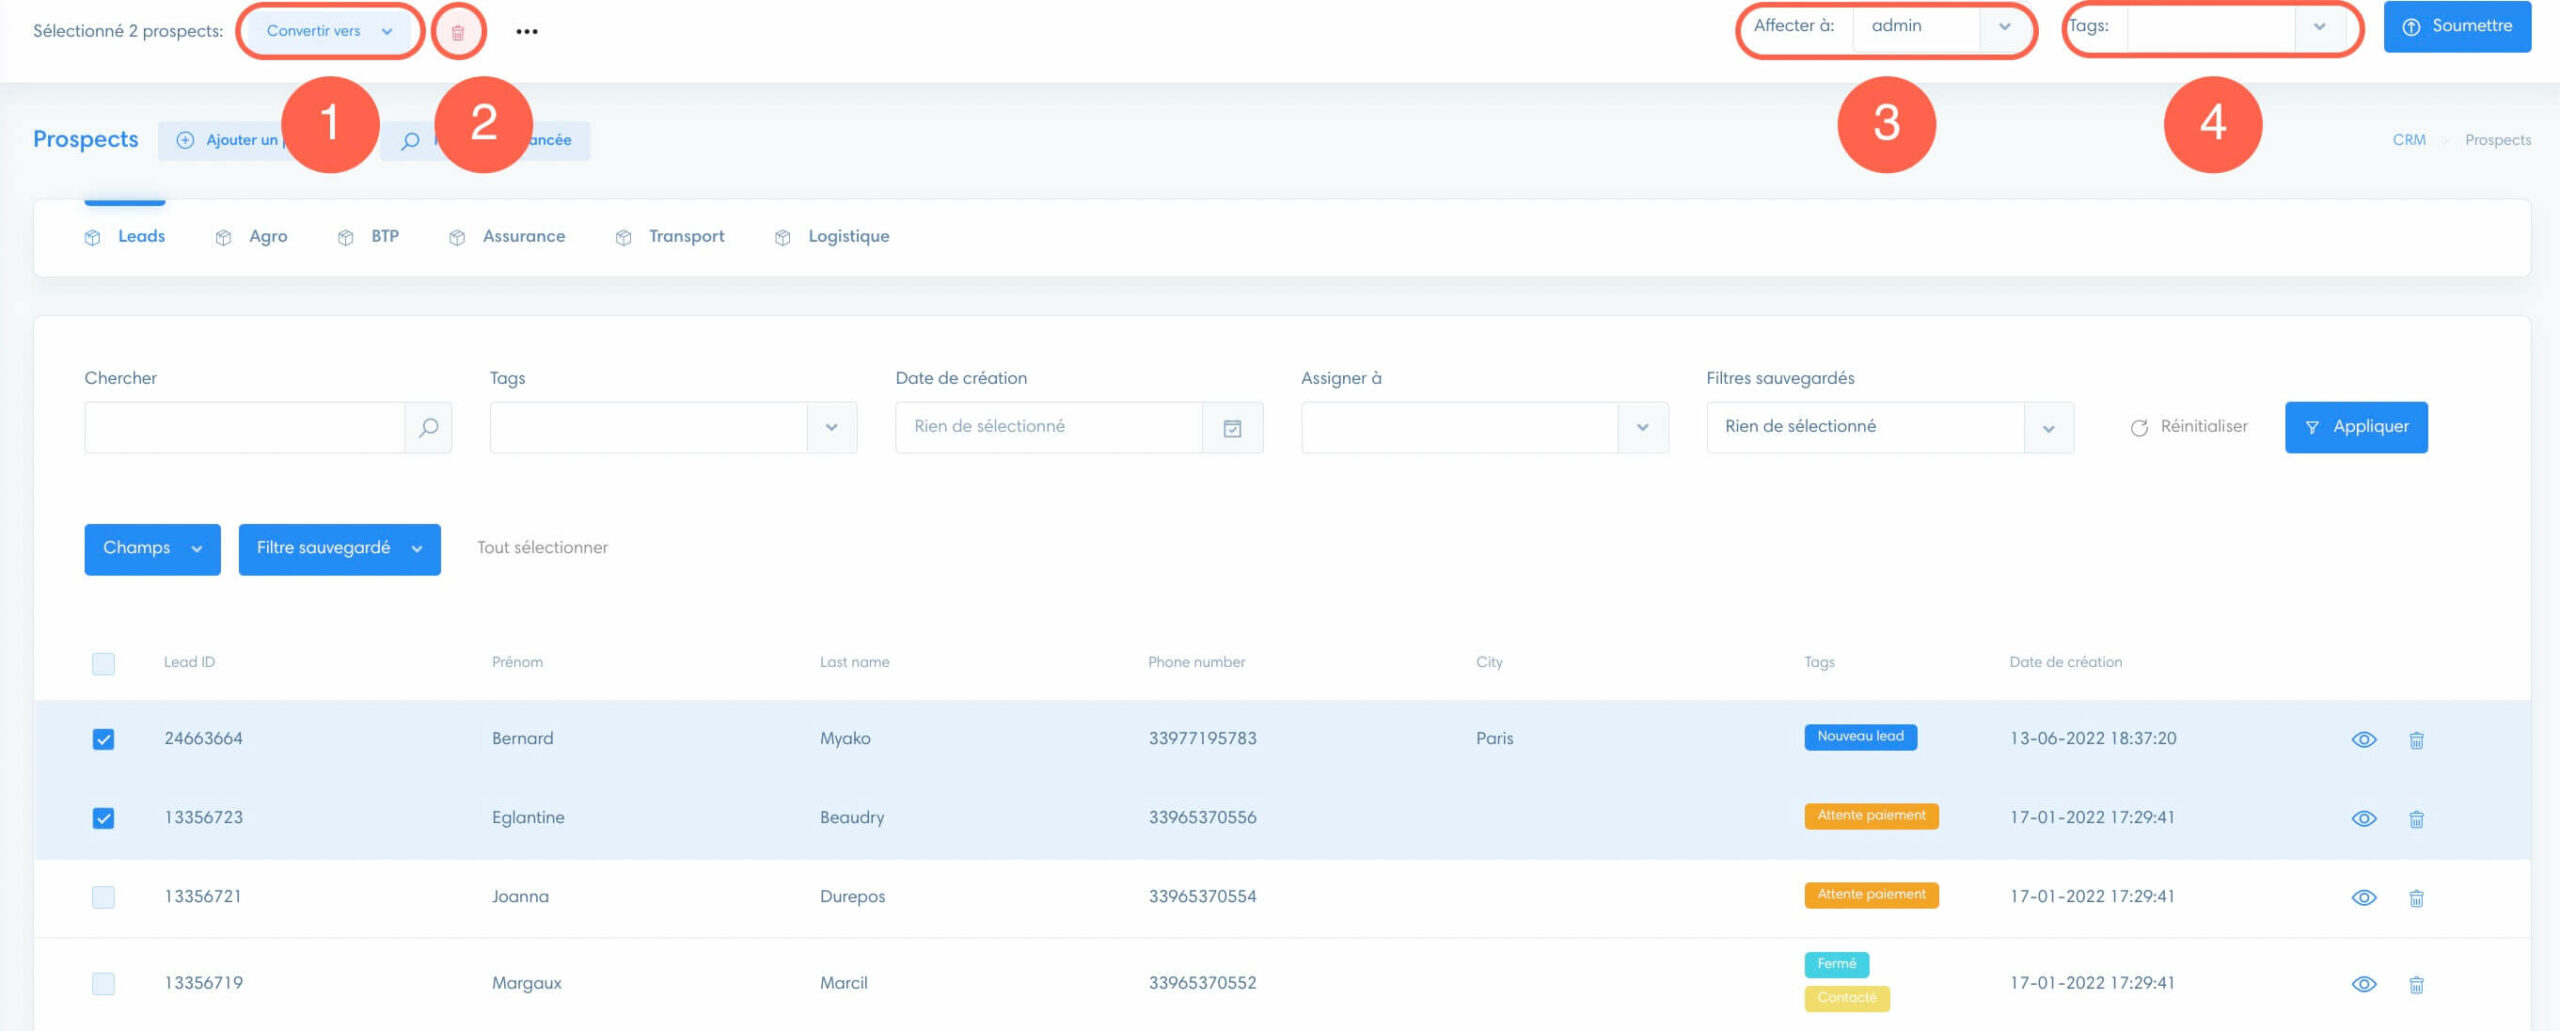
Modify leads
Once you’ve selected one or more leads, a section appears at the very top of the page. This section allows you to :
- Convert leads to another module
- Delete leads
- Assign leads to another user (choose the user then click on submit)
- Change tags (you can choose more than one)
“Select all” option
You can also click on “Select all” to convert all leads to another module.
This function also lets you assign and delete leads.

