
Introduction
The Kavkom’s integration into Zapier make you able to automate the flow of leads that will be incorporated into your CRM.
How to create a zap
First of all, you have to log in into your Zapier account or create your account.

Now, you can create your zap, you just must click on “Create Zap”.

The Triggers
The triggers are an Zapier’s mechanism that will begin an action.

For example: If you must create a zap between Facebook (lead) and Kavkom, the trigger will be when a new lead is detected from Facebook.

How to configure a trigger
Trigger Event: You must choose what will be the event that will begin the action.
For this example:

You can also set-up the Trigger Event, in this case, “New Lead” is set-up by default.
The next step is about setup the Facebook account from where the leads will be redirected into your CRM.

If this is your first time or you need to connect another account, then click on this button.
The next step is about to set up from which page you want to connect and the forms.


All you must do now is to click “Continue” and test your trigger!

The Actions
Type “Kavkom” into the search bar and choose it.

This step is about to set up the Action Event
In this example we about to create a new lead from Facebook into our Kavkom’s CRM.
Click on “Create Lead” and then on “Continue”.

Now, will choose with which account we want to connect.

If this is the first time you must connect your Kavkom’s account.
Click on “+ Connect a new account” and fill all the fields.

Next step, where can you find the required information?
- The API Key.
- The api key is your personal token.
advanced settings
- API settings
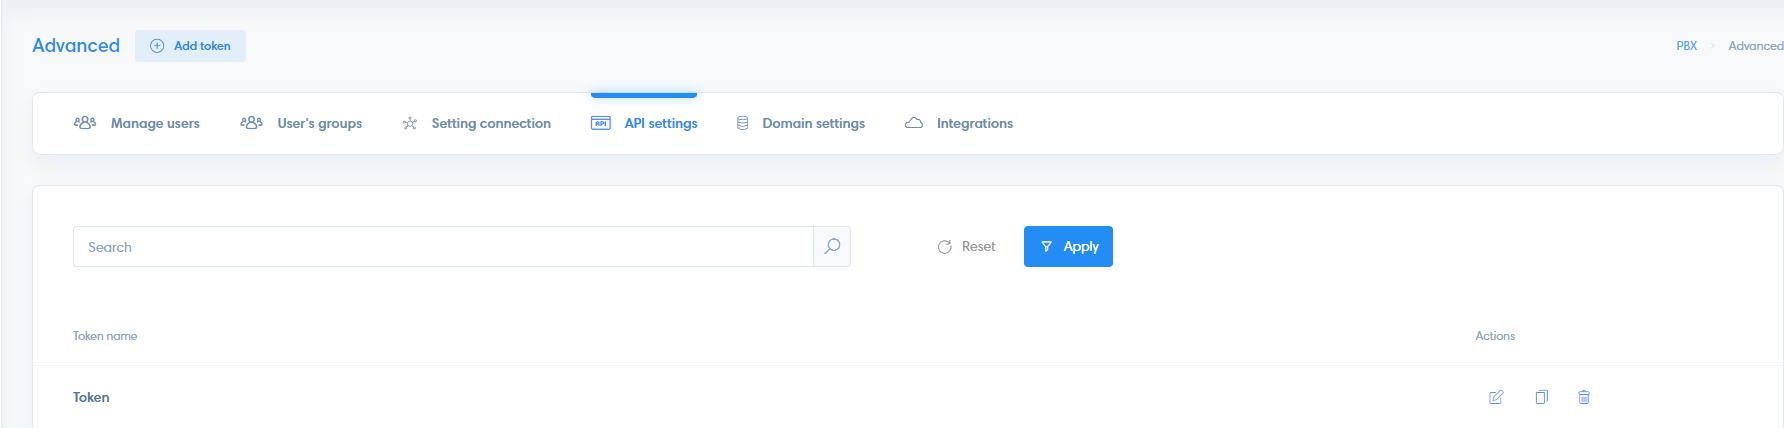
- Copy your Token
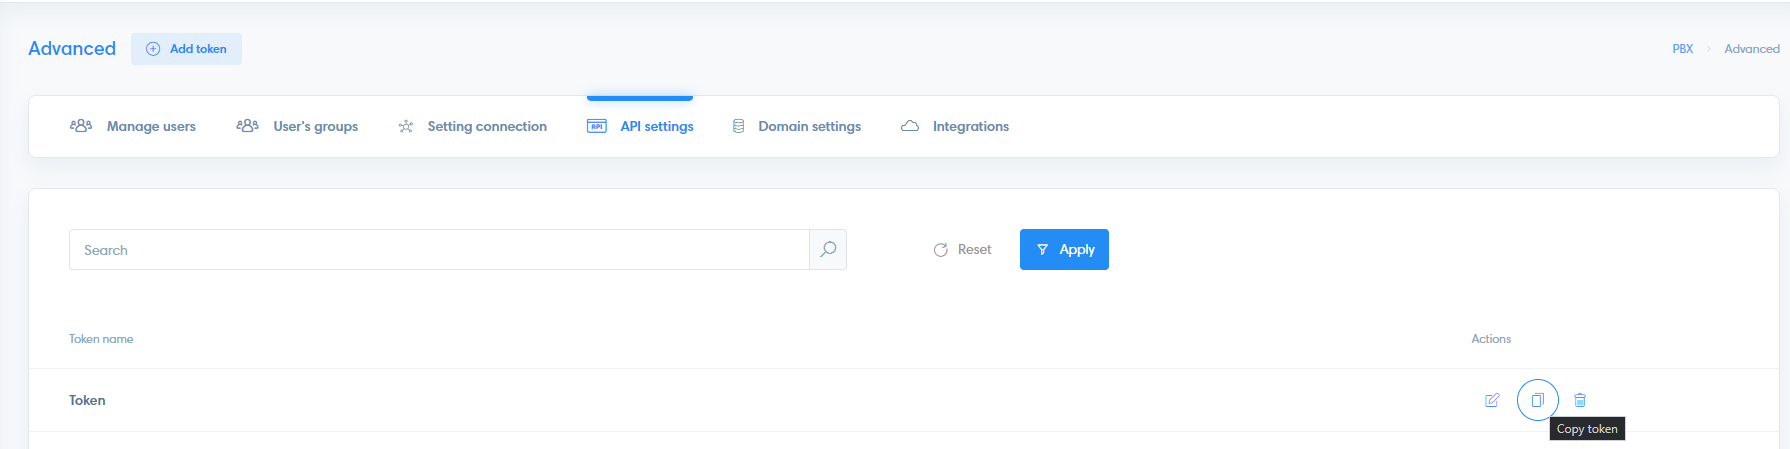
- If you don’t have yet a specific token for Zapier, you can create it.
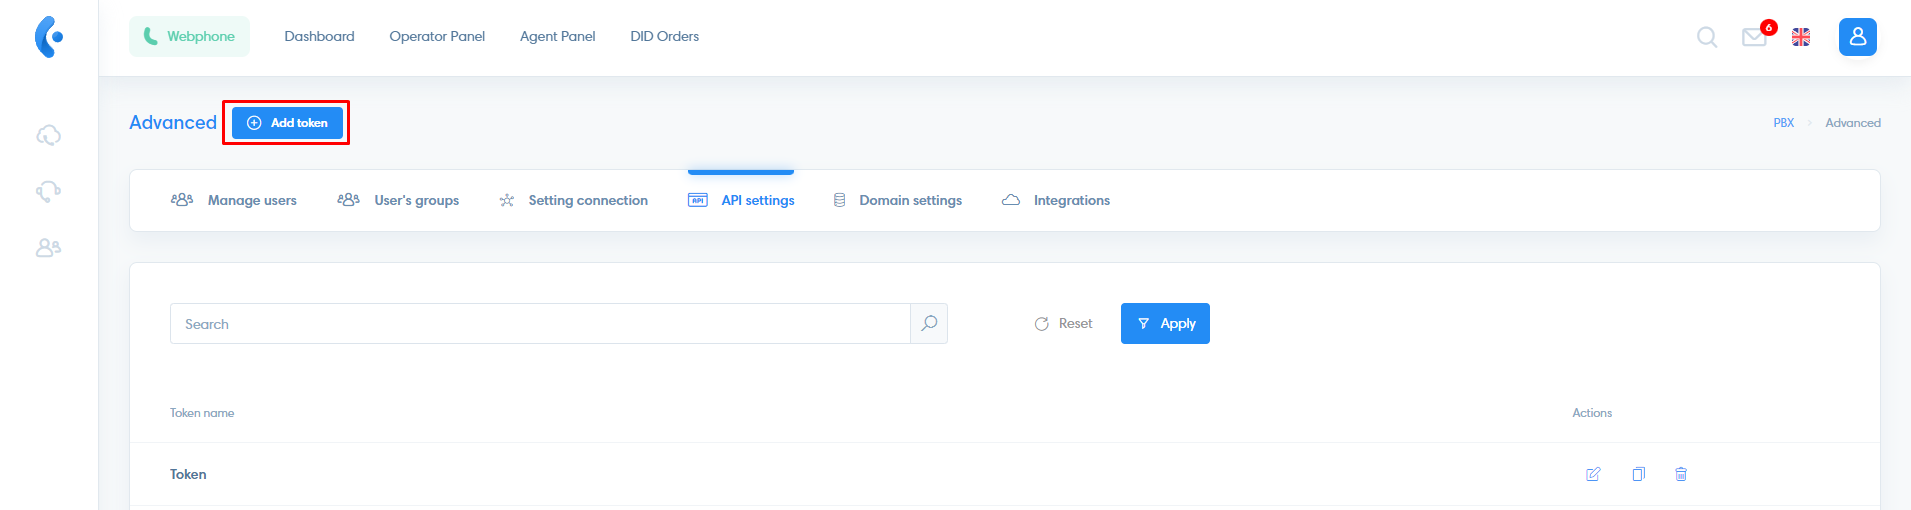
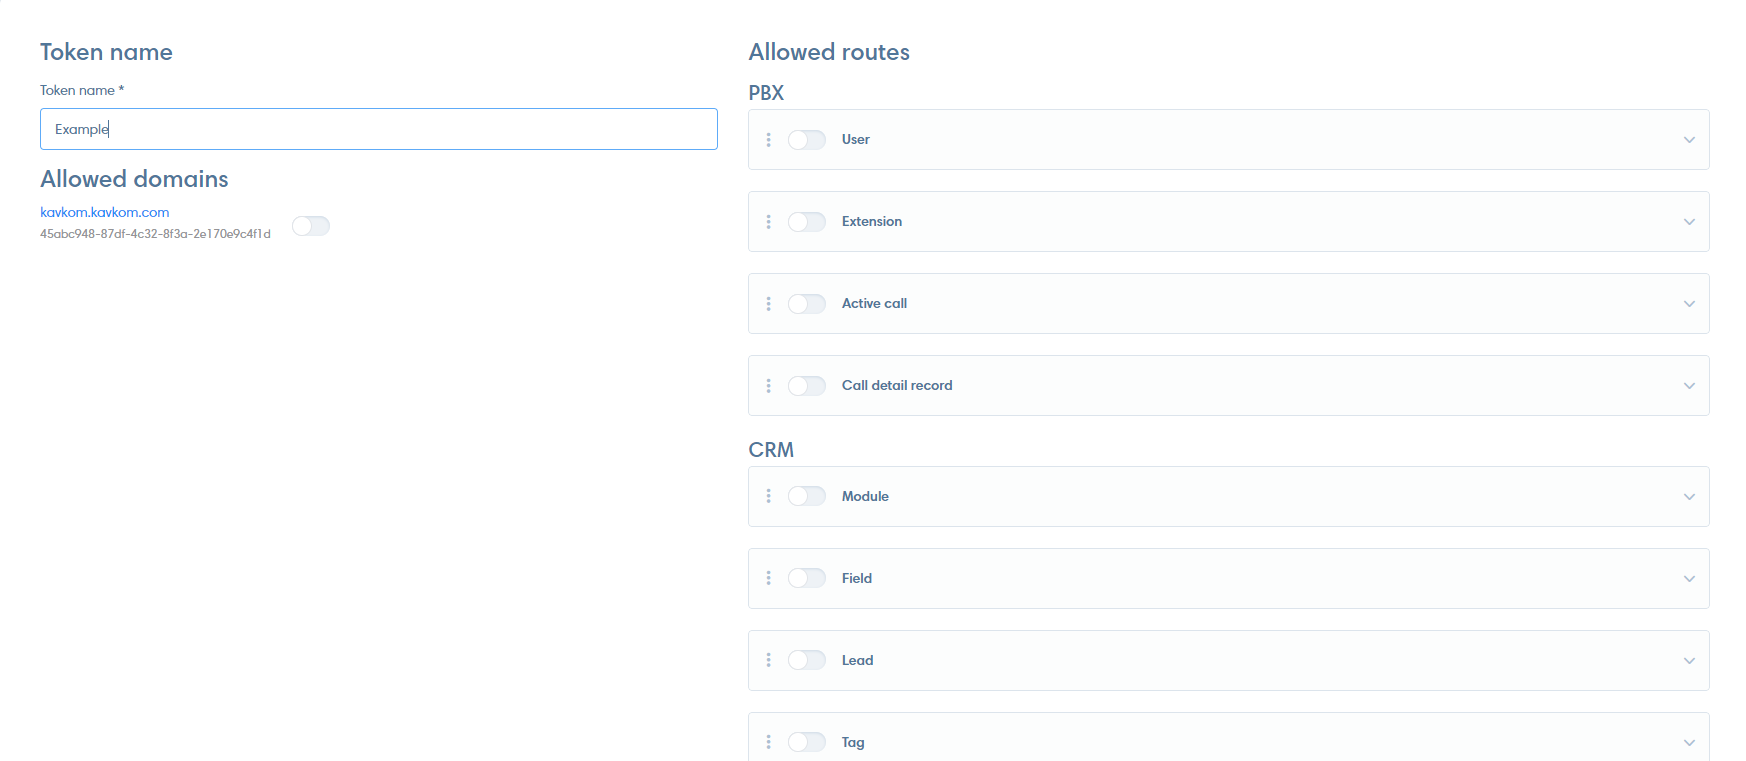
You must give a name for this specific token and enable the required permissions and click on “Create“.
- The domain uuid is right here.
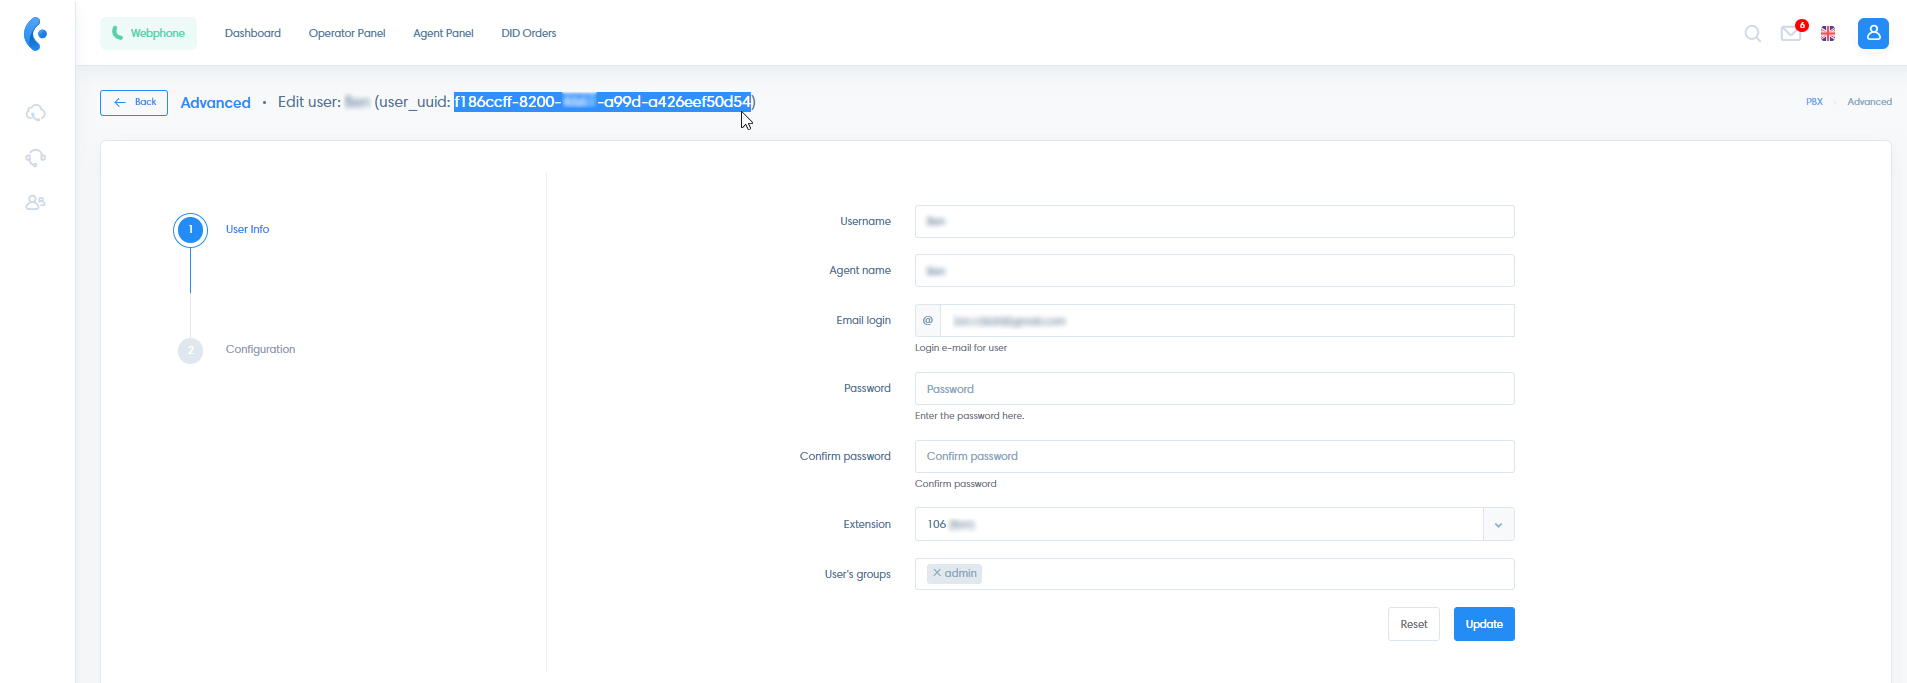
- The user uuid.
Advanced settings
Choose your user and click on “Edit”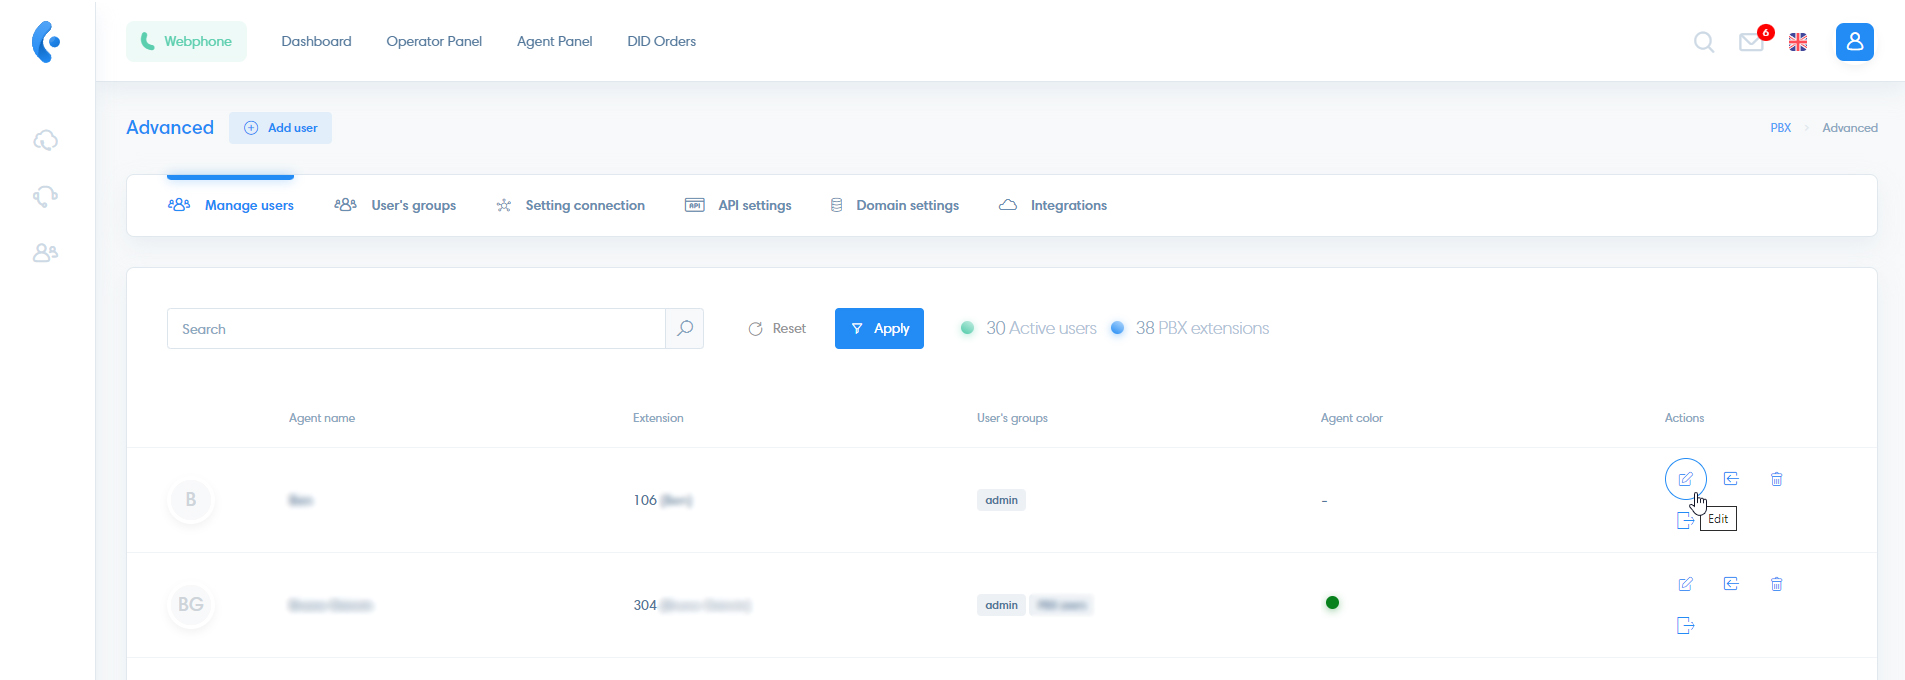
-
You will see your user uuid at the top of the page.
- The api key is your personal token.
The Set-up action step.
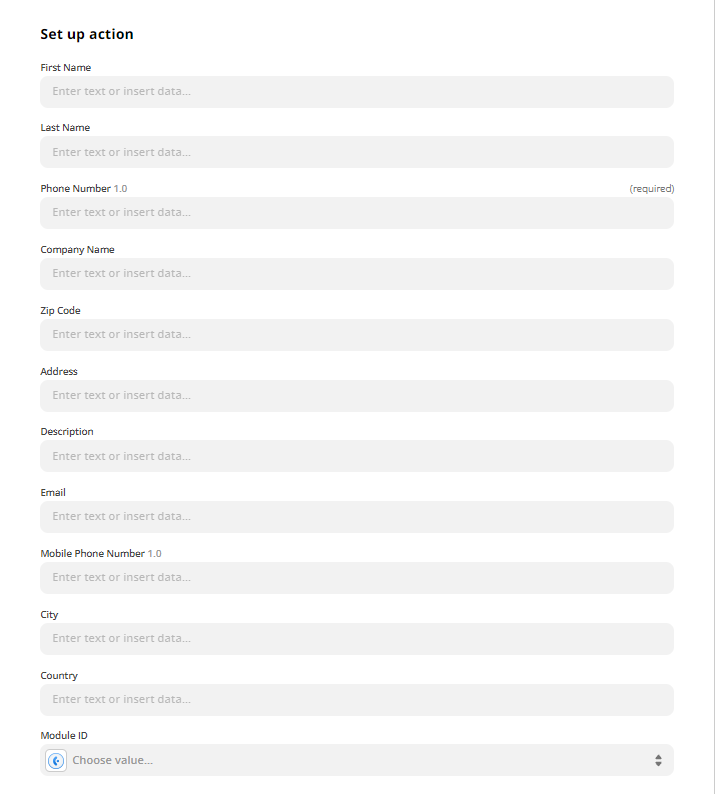
When you click on some field, you will see all the results you get from the Facebook’s form.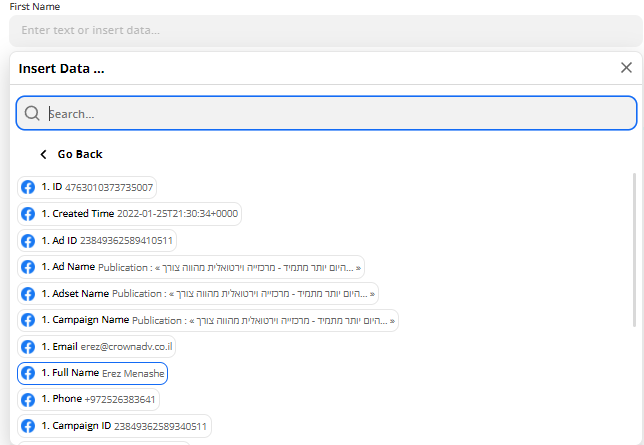
NOTE: the phone number is required!
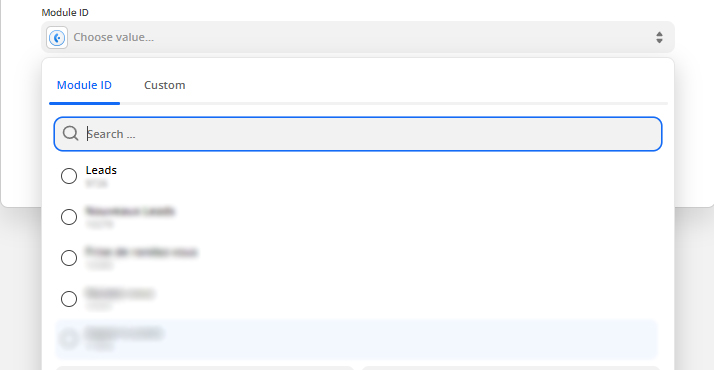
Don’t forget to fill the module id, mean in which module do you want the leads from Facebook.
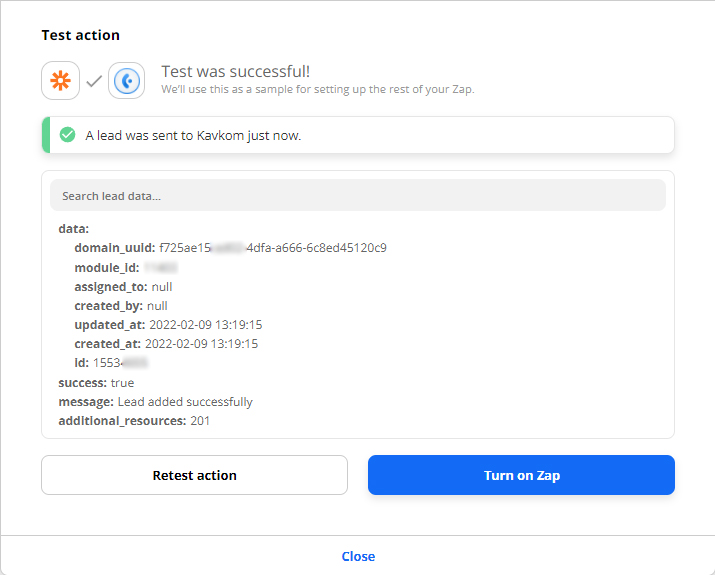
And click on “Continue”. Testing the action…
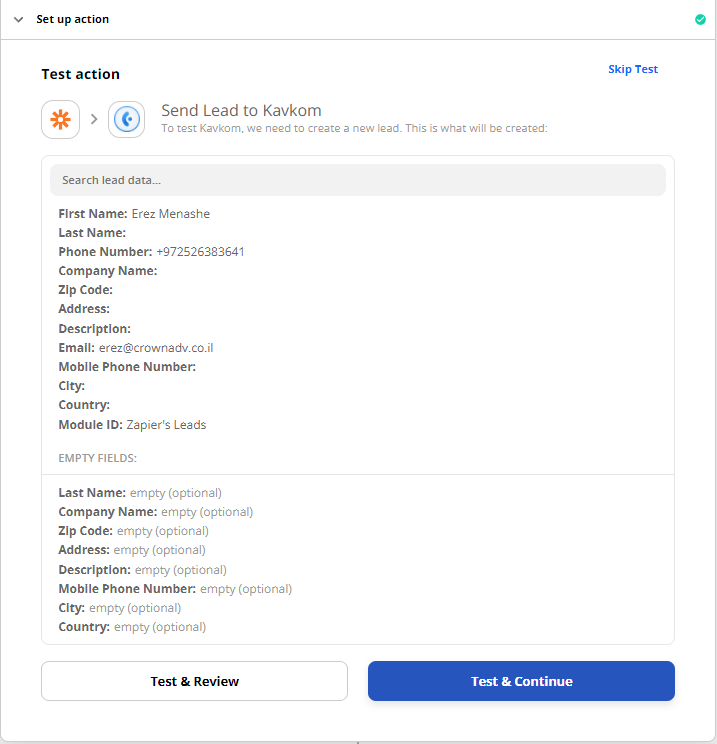
Then click on “Test & Continue”
Congratulations, you just added a new lead from Facebook into your Kavkom’s CRM!
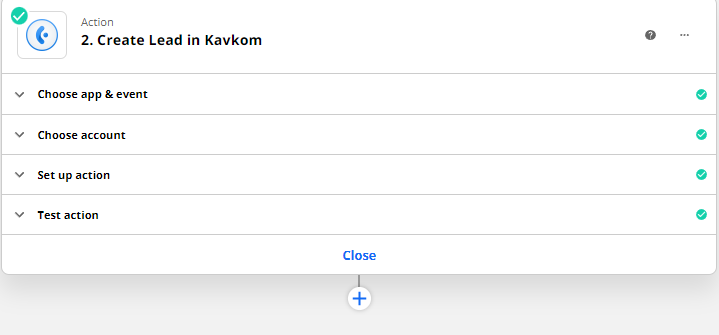
Final step, the assignation of a Tag.
Click on the “+” in the bottom on the action.
And back to set-up
One more time, choose “Kavkom”, but this time click on “assign tag” into the Action Event.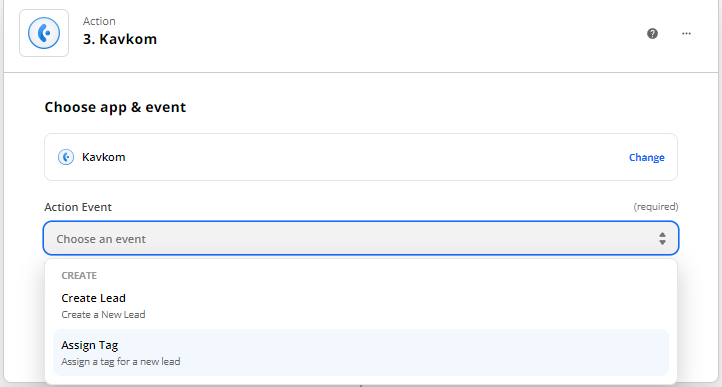
And continue.
Choose your account, like for the first action, and then click on “Continue”.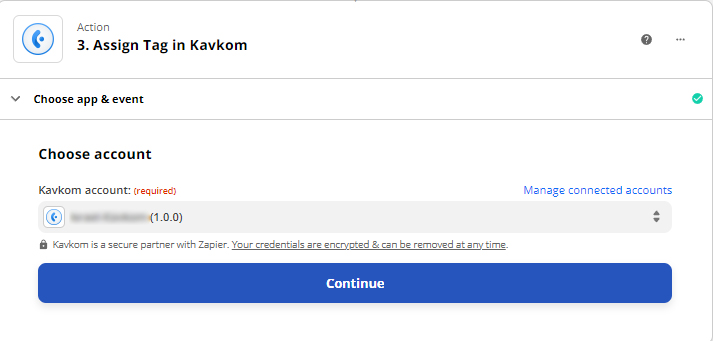
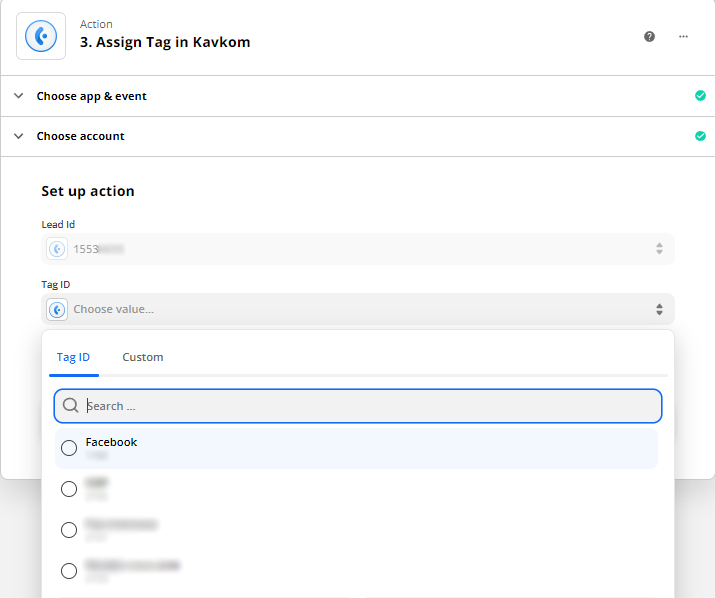
Set-up the action.
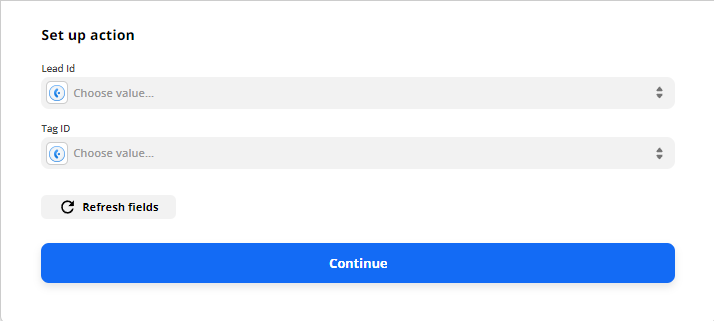
The Lead Id is the unique numerical identifier of this lead.
In Zapier, you will always see only one lead id, the last one.
It will be the lead you just put in your CRM in the previous action (create lead).
The Tag will help you in the organisation of your CRM.
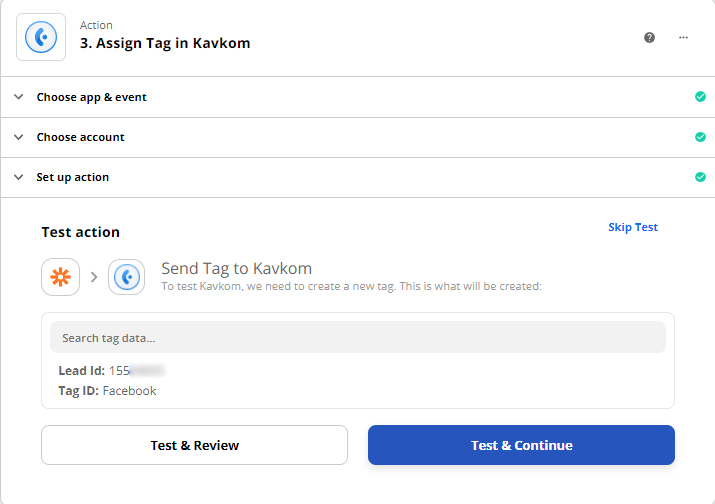
Now, we can click on “Continue”.
Finale step, testing the “Assign Tag” action.
CONGRATULATION!
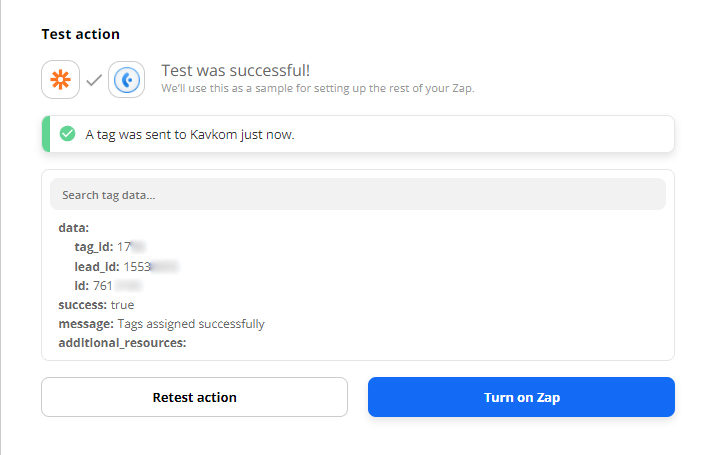
Now, you can see the new lead and his tag in your CRM, after turning on your zap, the leads from Facebook will be created in your CRM automatically!
If you have any question about the procedure, please contact us by email: contact@kavkom.com .
Thank you for reading!
